Home Blog Page 18

How to Download Instagram Reels Audio as MP3

Instagram Reels are short, entertaining videos users can create and share on the Instagram app. Reels can be up to 30 seconds long and typically feature music or audio overlaid on the video. Many users want to save the audio from Instagram Reels they like as MP3 files to listen to offline or use in their content.

MP3 is a common digital audio file format that allows for audio files to be compressed to take up less storage space while retaining most of the original audio quality. Downloading Instagram Reel audio as MP3 files provides a convenient way to save just the audio portion from a Reel video for offline listening and use.

Users can use several methods to download Instagram Reels audio as MP3 files, from third-party tools to changing the video file extension. The best method will depend on the user’s preferences, technical skills, desired audio quality, and access to specific apps or software.

Methods

1. Using a Third-party Reels Audio Download Tool

One of the easiest ways to download Instagram Reel audio is by using a dedicated third-party website or app designed specifically for extracting and saving Reel audio as MP3 files. Here are the steps:

Step 1: Find a Reputable Third-party Reels Audio Download Tool

Search for a reliable and safe website or mobile app to download Instagram Reels audio. Some examples include KeepVid, SnapInsta, Reel Downloader, and Videoder. Look for tools that are free to use and don’t require you to provide personal login details.

Step 2: Copy the Link to the Instagram Reel

Copy the Link to the Instagram Reel

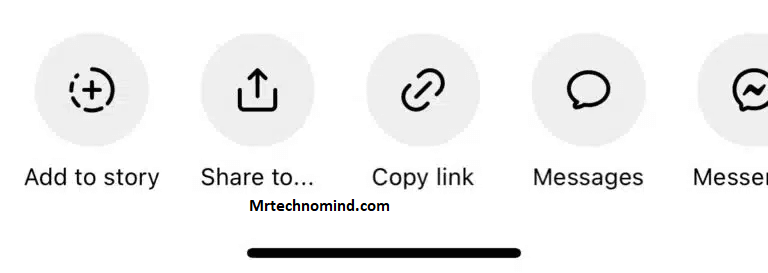
Open the Instagram app and navigate to the Reel from which you want to download the audio. Tap the three-dot menu button and select “Copy Link” to copy the direct URL of the Reel.

Step 3: Paste the Link Into the Reels Audio Download Tool

Paste the Link Into the Reels Audio Download Tool

Open the third-party Reels audio download website or app. Paste the copied Instagram Reel URL into the search bar or input field.

Step 4: Click “Download” to Save the Mp3 File

Paste the Link Into the Reels Audio Download Tool

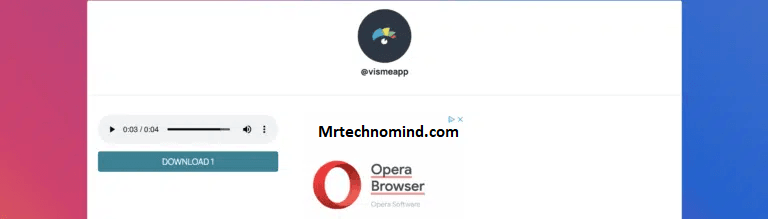
The website or app will analyze the Reel URL and extract just the audio in MP3 format. Click the “Download” button and save the MP3 file to your computer or mobile device.

Using a dedicated third-party tool provides a quick, easy way to download Instagram Reels audio as MP3 without any complicated setup. However, the audio quality may not be as high as converting the original video file.

2. Using a Video-to-MP3 Converter

Another method is to use a video-to-MP3 converter to extract and convert the Reel’s audio into an MP3 file. Here is how to use a converter:

Step 1: Download and Install a Video-to-mp3 Converter

Search online and download a free video-to-audio converter app like Any Video Converter, Freemake, ClipConverter, or VLC Media Player. Install the converter on your desktop computer or mobile device.

Step 2: Download the Instagram Reel Video to Your Device

Download the Instagram Reel Video to Your Device

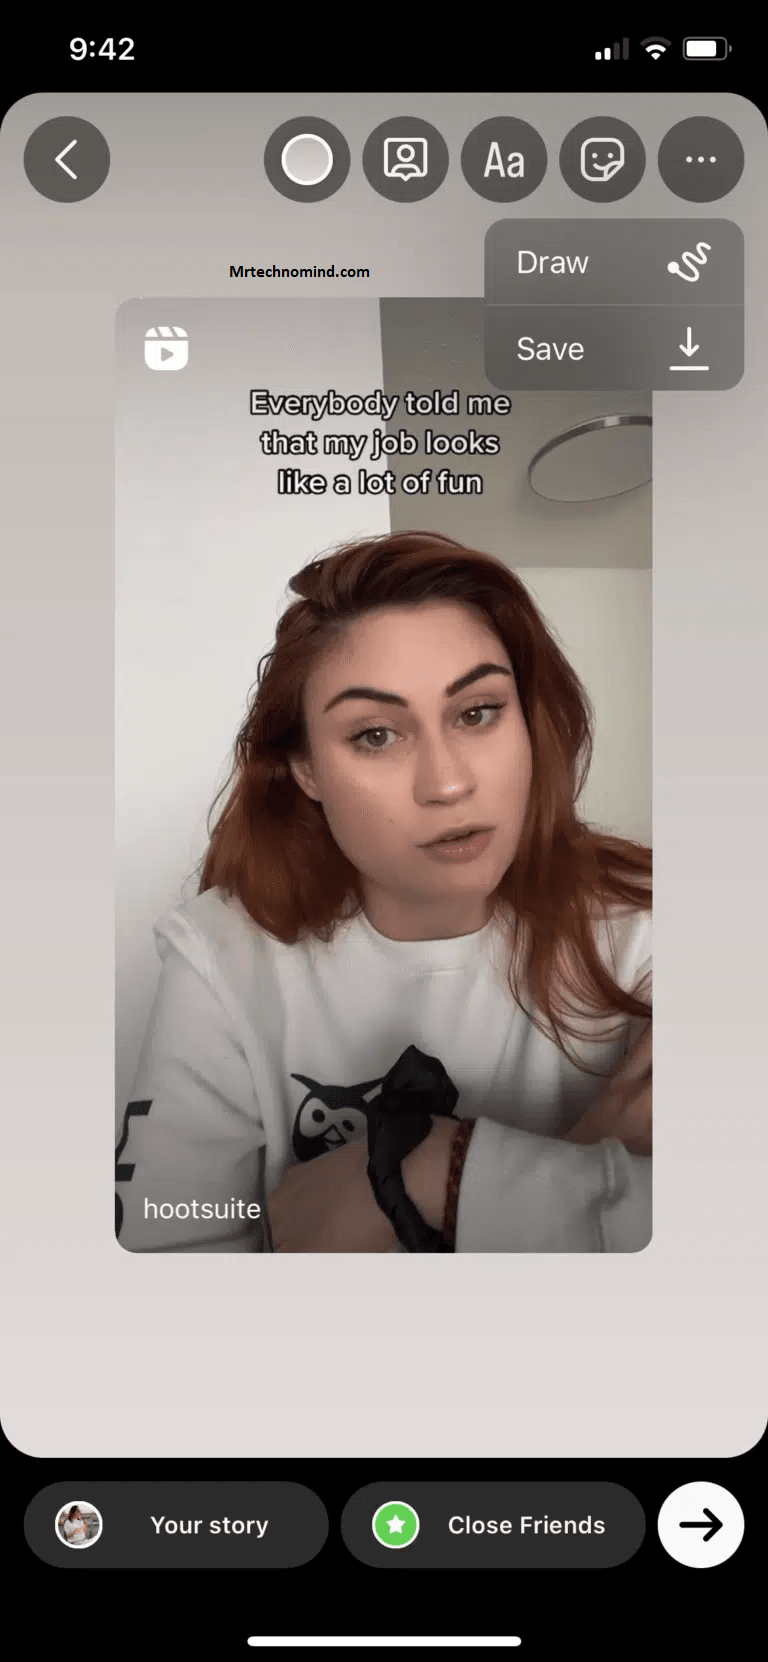
Please copy the link to the Instagram Reel video, then paste it into a website such as KeepVid or SaveFrom to download the Reel’s MP4 video file to your device. Make sure to save it in a location you can easily access.

Step 3: Import the Video Into the Converter

Import-the-Video-Into-the-Converter


Open the installed video-to-MP3 converter app. Click the “Add File” button and select the Instagram Reel MP4 video file you downloaded in the previous step.

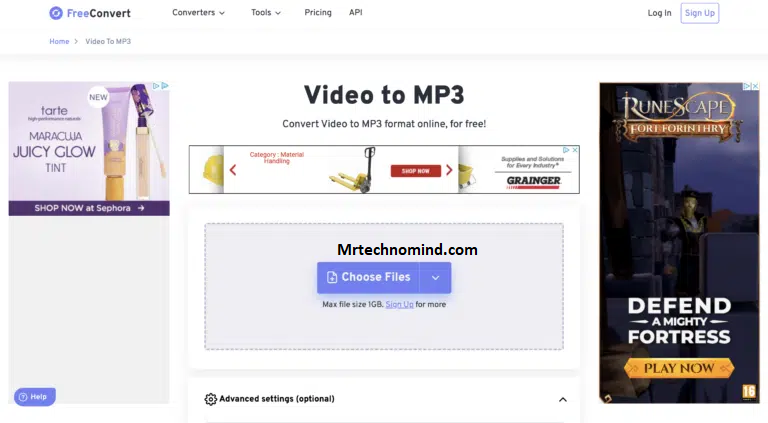
Step 4: Select Mp3 as the Output Format

Select Mp3 as the Output Format

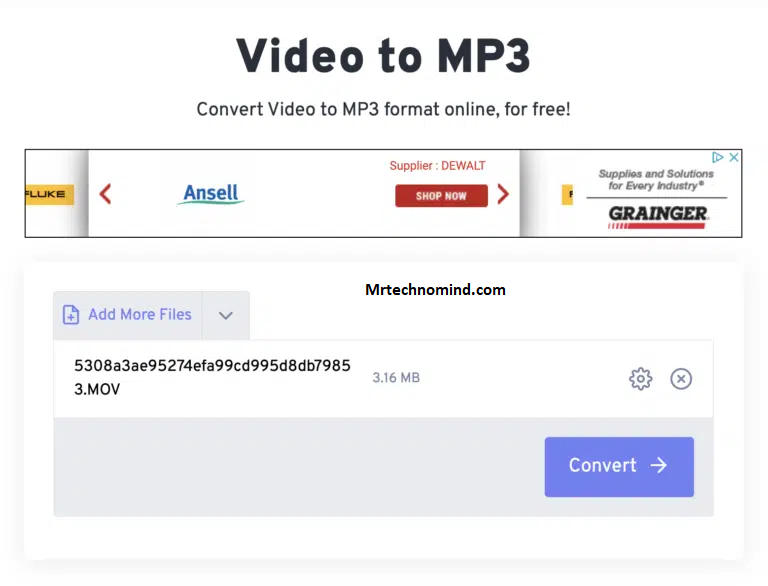
In the converter app, go to the output settings. Choose “MP3” from the dropdown menu as the output file format. This will extract and convert just the audio portion of the video into an MP3 file.

Step 5: Convert and Save the Mp3 File

Convert and Save the Mp3 File

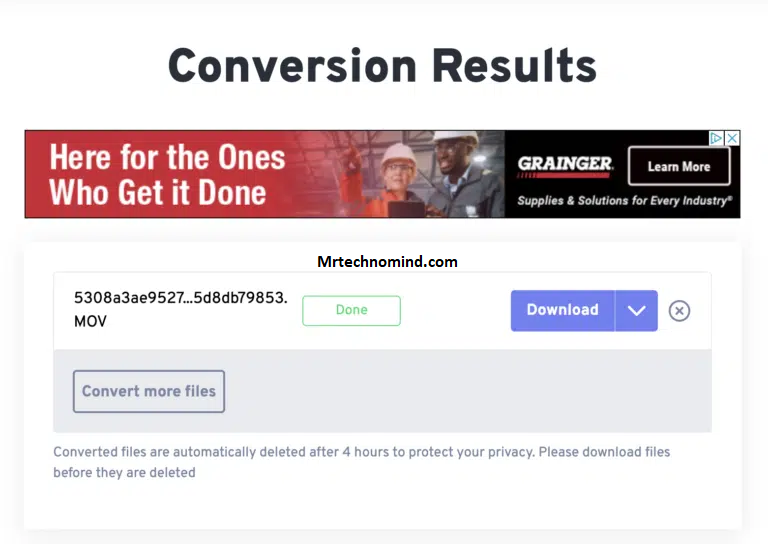
Hit the “Convert” button in the app. Once finished, the app will generate the Instagram Reel audio as a separate MP3 file. Save this MP3 file to your computer or phone.

A video converter provides high-quality audio since it extracts directly from the original video file. However, there are extra steps compared to using a dedicated online tool.

3. Changing the Video File Extension

A simpler method is to change the file extension of the downloaded Reel video from MP4 to MP3. Here are the steps:

Step 1: Download the Instagram Reel Video

Use a website like KeepVid or SaveFrom to download the MP4 video file of the Instagram Reel you want. Please save it to a location on your device you can easily access.

Step 2: Right-click and Rename the File

Right-click and Rename the File

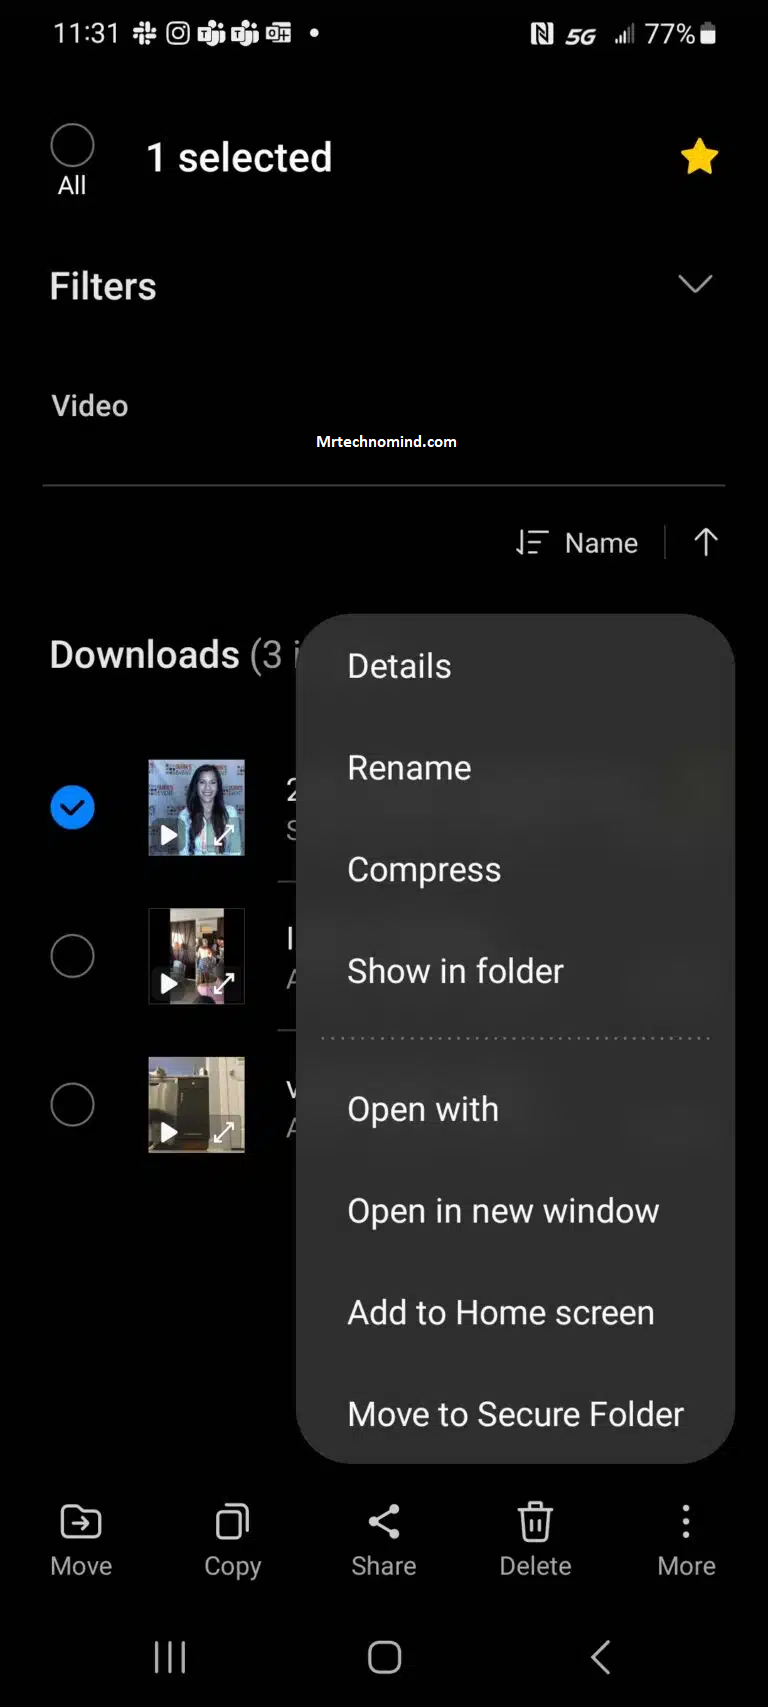
Find the downloaded Instagram Reel video file on your computer or phone. Right-click the file, hover over “Rename”, and select it.

Step 3: Change the File Extension From .mp4 to .mp3

The file name should be highlighted. Change the end of the file name from “.mp4” to “.mp3”. Make sure the name is exactly the same, only changing the file extension letters.

Step 4: Hit Enter to Save the New Mp3 File

Once you’ve changed the file extension, hit the Enter key on your keyboard. This will save the changes. The file is now saved as an MP3 even though it’s still a video file.

Changing the extension tricks your computer into thinking the file is an MP3. However, the file remains a video, so the “audio” won’t play properly. Use this method carefully.

4. Using the Vlognow Video Editor

VlogNow is a popular free video editing app for mobile devices. You can use VlogNow’s audio extraction feature to download Instagram Reels audio into an MP3 file.

Step 1: Download and Install Vlognow

Search for “VlogNow” in the App Store or Google Play Store. Download and install the VlogNow app on your iPhone or Android phone. Open the app and sign up for a free account.

Step 2: Import the Instagram Reel Video

Import the Instagram Reel Video

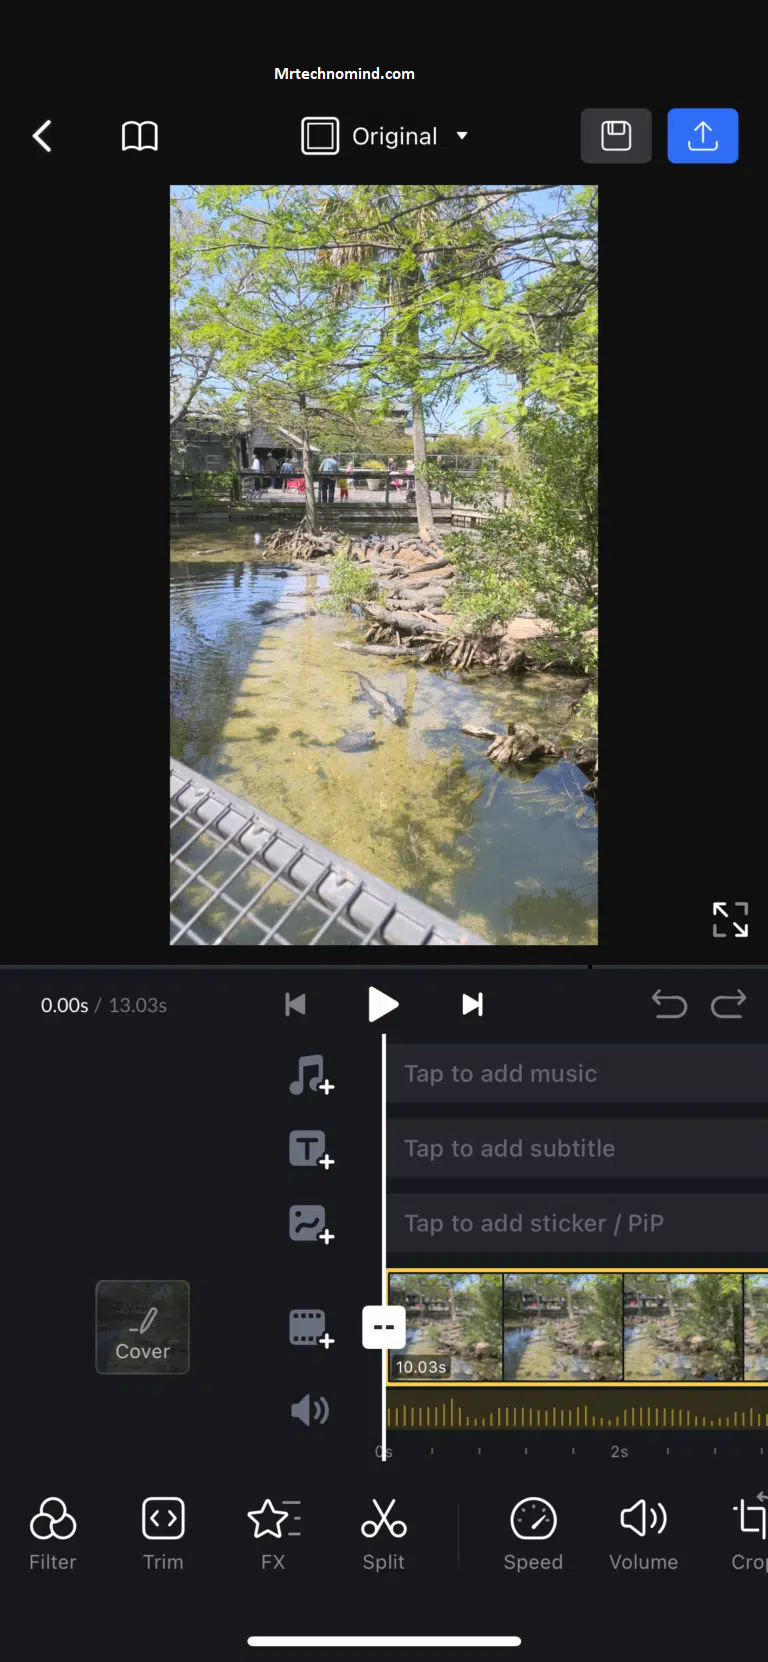
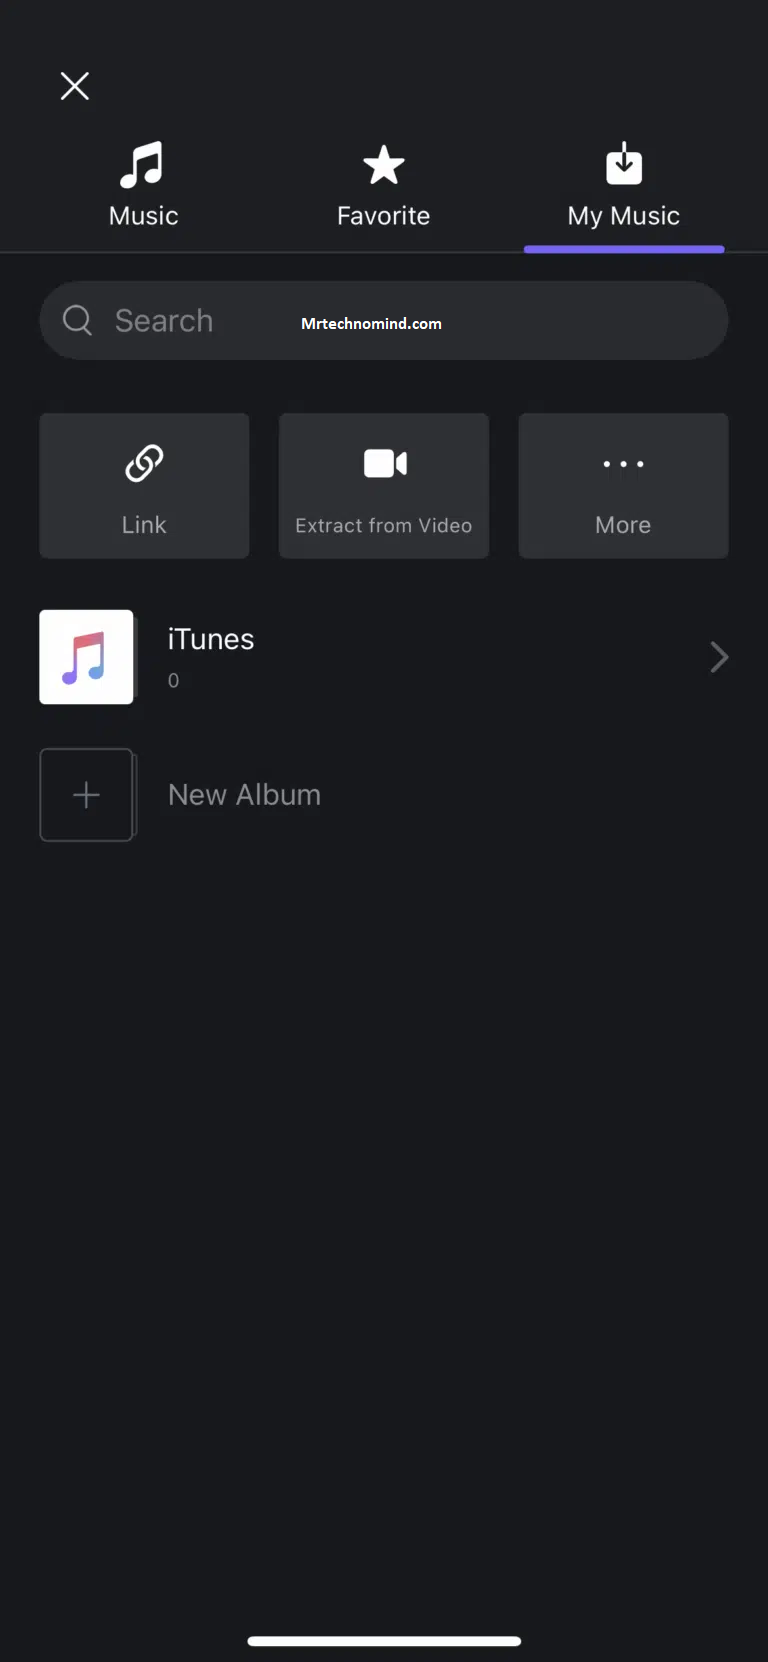
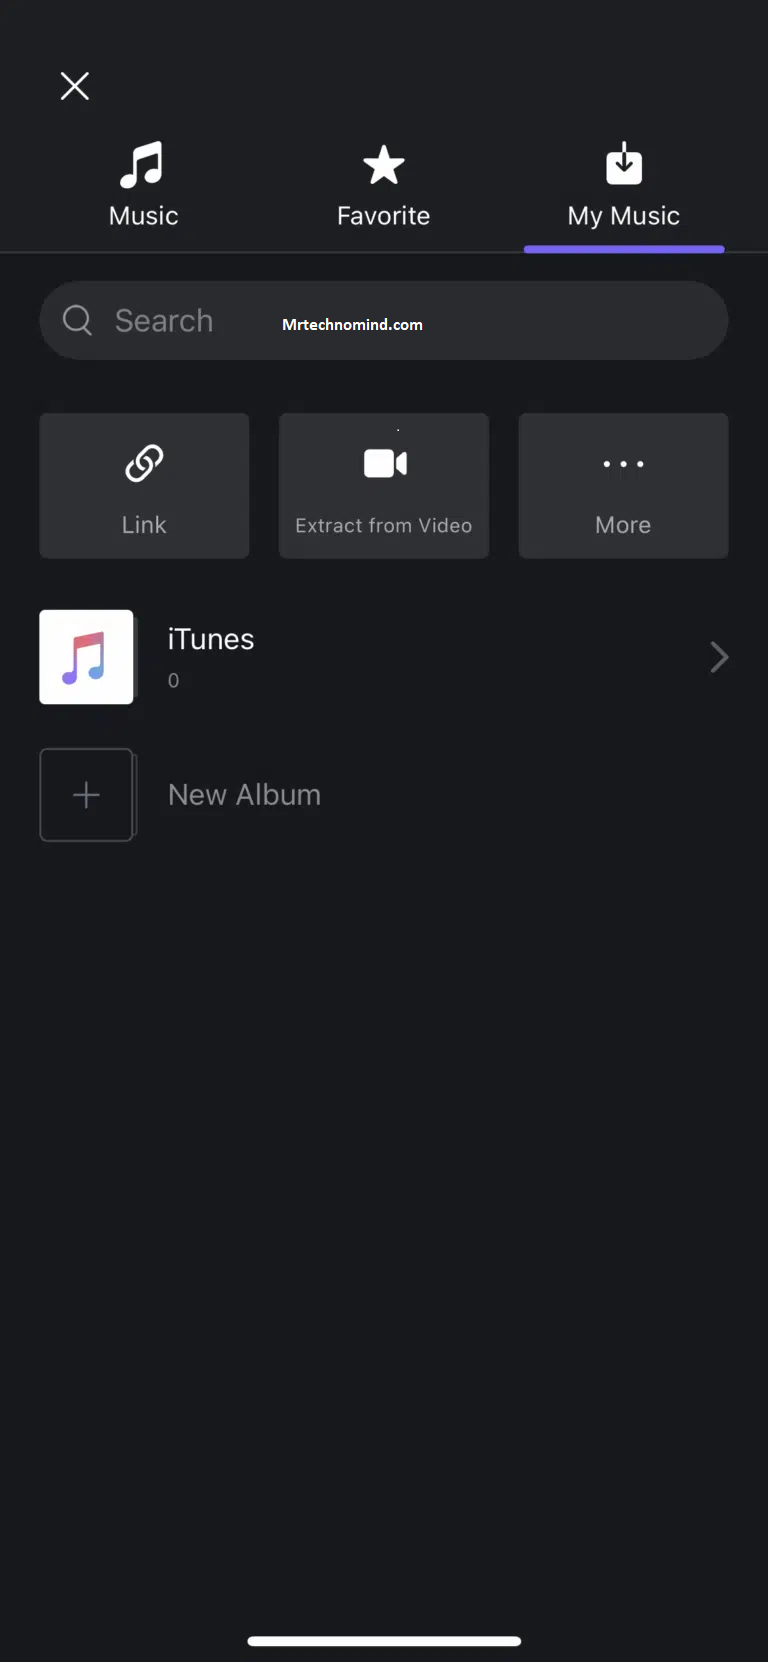
Tap the + button in VlogNow and select “Import Video”. Find and import the Instagram Reel video file you downloaded to your phone.

Step 3: Go to the Audio Tab and Select Extract Audio

Go to the Audio Tab and Select Extract Audio

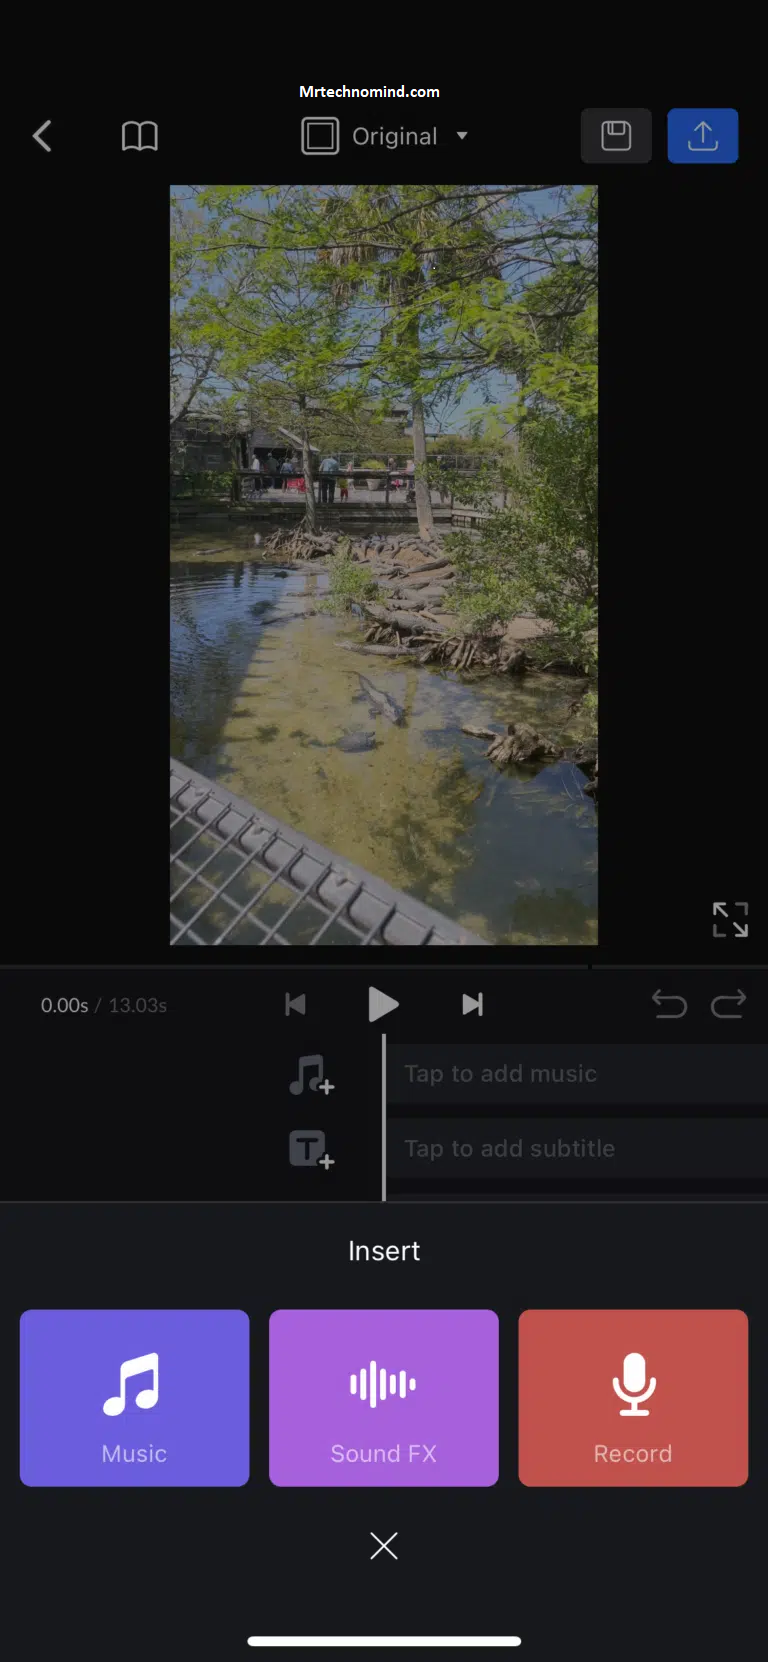
With the Reel video selected, tap on the “Audio” tab at the bottom. Then tap the “Extract Audio” button to extract just the audio portion.

Step 4: Select Mp3 as the Format

Select Mp3 as the Format

A window will pop up showing audio format options. Choose “MP3” from the list and tap “Extract” to extract the Reel’s audio as an MP3 file.

Step 5: Save the Extracted Mp3 File

Save the Extracted Mp3 File

Once the extraction finishes, you can preview the MP3 audio. Tap “Save” and choose where to save the Instagram Reel’s extracted audio file on your phone.

Using VlogNow provides high-quality audio extraction and easy conversion to MP3 on mobile devices. However, an app download is required instead of using a web-based tool.

10 Best Instagram Reels Audio Downloader

1. SnapDownloader

SnapDownloader

SnapDownloader is a third-party app that allows users to save Snapchat photos, videos, and stories without the sender knowing. While convenient, using SnapDownloader raises ethical concerns as it violates Snapchat’s terms of service and infringes on users’ privacy expectations. The app has faced scrutiny for enabling the nonconsensual sharing of intimate images. Critics argue that SnapDownloader promotes nonconsensual voyeurism and harms Snapchat’s ephemeral messaging design. However, supporters claim it allows benign preservation of memories. Overall, SnapDownloader facilitates the discreet saving of Snapchat content, but its use for interpersonal surveillance makes its ethics ambiguous.

2. YT Saver

YT Saver

YT Saver is a third-party website and app that allows users to download videos from YouTube. It provides an interface to enter a YouTube URL, and then convert and saving the video file to the user’s device. This violates YouTube’s Terms of Service, prohibits downloading videos without permission. Supporters of YT Saver argue that it enables offline viewing and archiving of videos. However, critics point out the potential for piracy, lost ad revenue for creators, and disregard of intellectual property rights. Overall, while YT Saver provides a convenient tool for users, its legal and ethical implications are dubious due to circumventing YouTube’s restrictions and lack of compensation for content creators.

3. 4K Stogram

4K Stogram

4K Stogram is a desktop application that allows users to download photos and videos from Instagram in high resolution. It works by scraping Instagram user profiles and saving the media content to a computer. This violates Instagram’s Terms of Use which prohibit scraping and downloading content without permission. 4K Stogram circumvents Instagram’s API and protections. Supporters argue it provides an easy way to backup and preserve Instagram photos. However, there are concerns around privacy violations, intellectual property infringement, and lost revenue for Instagram. The ethics are debatable as 4K Stogram enables unauthorized copying of copyrighted content, but some believe personal use is fair. Overall, 4K Stogram provides a powerful but legally dubious tool for saving Instagram media locally.

4. iTubeGo

iTubeGo

iTubeGo is a desktop software that allows users to download videos and music from popular platforms like YouTube, Facebook, and Instagram. It works by converting online media into downloadable file formats. While iTubeGo provides an easy way to save and backup online content, it has faced ethical concerns. By enabling downloads, iTubeGo violates many platform’s Terms of Service which prohibit unauthorized copying. Critics argue it encourages piracy and disregards copyright. However, supporters claim that downloading for personal use should be legal. Overall, iTubeGo gives users access to media downloading capabilities that bypass platform restrictions, but the ethics are debatable as it enables potential intellectual property infringement.

5. By Click Downloader

By Click Downloader

By Click Downloader is a browser extension that allows quick saving of videos, images, and other media from various websites. It integrates download buttons across the internet, letting users easily grab content with one click. However, bypassing standard download procedures raises ethical concerns. By Click Downloader facilitates pirating copyrighted material from sites like YouTube and Facebook. Critics argue it promotes disregard of intellectual property rights. However, advocates believe users should be able to save content for personal use freely. Still, By Click Downloader enables unauthorized distribution of media. While convenient, it skirts legality by ignoring platforms’ terms of service and copyright protections. Overall, the tool simplifies content saving, but with ethically dubious implications.

6. VidJuice

VidJuice

VidJuice is a website that allows users to download videos from major platforms like YouTube, Facebook, and Instagram. It works by converting video files into downloadable formats, circumventing restrictions put in place by these sites. While supporters of VidJuice argue it enables offline viewing and archiving, critics point out several ethical concerns. By enabling unauthorized downloading, VidJuice violates platforms’ Terms of Service and disregards copyright protections. It also facilitates piracy and harms revenue for video creators. However, advocates believe users should have the right to store copies of videos for personal use. Overall, VidJuice provides a tool for easy media downloading but ignores intellectual property rights and platform policies. Its implications are legally and ethically disputed.

7. VideoProc

VideoProc

VideoProc is a desktop software application that allows users to download, convert, edit, and record video content from major platforms like YouTube, Facebook, and Instagram. While offering an integrated suite of video tools, VideoProc has faced ethical scrutiny for enabling unauthorized downloading of online videos. By letting users save copies of videos without permission, VideoProc violates many platforms’ Terms of Service. Critics argue it promotes piracy and disregards copyright protections. However, advocates believe users should be able to archive videos for personal use. Overall, VideoProc provides powerful video software but ignores intellectual property rights by circumventing restrictions on downloading. Its implications are ethically ambiguous as it enables infringement but users may have fair intentions.

8. SaveFrom.net

SaveFrom.net

SaveFrom.net is a website that allows users to download videos from popular platforms like YouTube, Facebook, Instagram, and Twitter. It works by converting videos into downloadable formats, skirting restrictions put in place by these sites. While providing a quick and easy way to save online videos, SaveFrom.net has faced ethical scrutiny. Critics argue it promotes piracy, disregards copyright, and violates platforms’ Terms of Service. However, advocates believe users should be able to store copies of videos for personal use. Still, SaveFrom.net enables unauthorized distribution of copyrighted material. While the site offers a convenient tool, it ignores intellectual property rights and undermines video creators’ ownership. Overall, SaveFrom.net simplifies downloading but with legally and ethically questionable means.

9. Insta.SaveTube.Me

Insta.SaveTube.Me

Insta.SaveTube.Me is a website that allows users to download videos, photos, and stories from Instagram accounts without permission from creators. It works by scraping Instagram content and converting it into downloadable files. While providing a simple way to archive Instagram media, Insta.SaveTube.Me raises ethical concerns. It violates Instagram’s Terms of Service which prohibit unauthorized downloading. Critics argue it infringes on copyright protections and undermines creators’ ownership. However, supporters believe users should be allowed to save social media content for personal use. Still, Insta.SaveTube.Me enables illegal distribution of copyrighted material without consent. While offering a useful tool for users, it ignores intellectual property rights and Instagram’s policies. Overall, the implications of Insta.SaveTube.Me are legally and ethically disputed.

10. Reel Saver

Reel Saver

Reel Saver is a mobile app that allows users to download videos from Instagram Reels without consent from the creators. It works by scraping Reels content and converting videos into downloadable files. While providing an easy way to save Reels, Reel Saver has faced ethical criticism. It violates Instagram’s Terms of Service and infringes on copyright protections. Critics argue it undermines creators’ ownership and Instagram’s ephemeral content model. However, advocates believe users should be able to archive social media for personal use. Still, Reel Saver facilitates unauthorized copying and distribution of videos. While offering a useful tool for users, it disregards intellectual property rights and Instagram’s policies. Overall, Reel Saver simplifies access but with legally and ethically ambiguous implications.

Conclusion

Users can choose from various methods to successfully download the audio from Instagram Reels as MP3 files. Choosing the right method depends on your needs:

  • Third-party tools provide the quickest and easiest option without installing software but may have lower audio quality.
  • Video converter apps deliver high-quality audio extraction but require downloading software and more steps.
  • Changing the file extension is the simplest option, but it won’t properly convert the video to playable audio.
  • The VlogNow app offers excellent quality audio extraction tailored for mobile users but requires installation.

No matter which method you choose, downloading Instagram Reels audio as MP3 files is an excellent way to save the audio content you want to listen to later offline. Some troubleshooting tips include double-checking the Reel URL, verifying your downloaded files, and ensuring you use trusted software. Additional resources like online forums and video tutorials can help walk through the process.

Frequently Asked Questions

1. What Are Some Good Third-party Sites for Downloading Instagram Reels Audio?

Some of the most popular and reputable third-party sites for downloading Instagram Reel audio include KeepVid, SnapInsta, Reel Downloader, and Videoder. They offer quick and easy audio extraction without needing to install any software.

2. Does Changing an Instagram Reel’s File Extension From .mp4 to .mp3 Actually Convert the Audio?

No, simply changing the file extension does not convert and extract the audio from the video file. The file remains a video, so while the extension may say .MP3, trying to play it as audio will not work properly.

3. What is the Best Video-to-mp3 Converter App for Ios Devices?

Some top converter apps for iOS include Video to MP3 Converter by Jakub Czerwinski, Audio Converter by Rodrigo Kolb, and Video to MP3 Maker by Mobizon. They provide fast video-to-audio conversion optimized for iPhone and iPad.

4. Can I Use Vlognow to Download Instagram Reels Audio on My Android Device?

Unfortunately, VlogNow is only available for iOS and not Android devices currently. Some good alternative mobile video editor apps for Android include InShot, KineMaster, and PowerDirector with audio extraction features.

5. What is the Highest Quality Option for Downloading Instagram Reels Audio?

Using a video converter app to extract the audio from the original Instagram Reel video file will provide the highest audio quality. This avoids any compression or quality loss with online third-party tools.

Common Building and Pest Inspection Findings in Your Ipswich Property

0

Hey there! Buying or owning a property in Ipswich? Well, you’re in the right place because we’re about to dive into something super crucial – building and pest inspections in Ipswich. These inspections aren’t just a formality; they’re like your property’s health checkup. Whether you’re in the market for a new place to call home or you’ve been cozy in your current one for a while, these inspections are your secret weapon against potential property nightmares.

Picture this: you’ve finally found your dream home in Ipswich. It’s got everything you’ve ever wanted – that cute backyard, a cozy kitchen, and a spot to call your own. But hold on, before you get too carried away with visions of decorating and barbeques, there’s a reality check. Even the prettiest of homes can hide some not-so-pretty secrets.

That’s where building and pest inspections come into play. They’re like your property’s detectives, sniffing out issues that can be hidden to the untrained eye. We’ll walk you through some of the common findings you might encounter during these inspections. Trust us, it’s better to know what you’re dealing with now than face a costly surprise later.

So, grab a cup of coffee, get comfy, and let’s chat about those common findings that might pop up during your Ipswich property inspection. This is the kind of chat you’d have with a friend, not a textbook. We’re here to break it down in a friendly, no-nonsense way, so you’ll be armed with the info you need to make smart property decisions. Let’s get started!

Common Building and Pest Inspection Findings in Your Ipswich Property

  • Termites – The Silent Invaders

Okay, let’s chat about these tiny terrors – termites. In Ipswich, they’re like the sneaky intruders you never invited to your property party, but they show up anyway. The thing is, they might be small, but the trouble they can cause is HUGE.

The Silent Threat: So, why should you care about termites? Well, they pose a significant threat to Ipswich properties. They’re like property ninjas, silently munching away at your home’s structure, often without you even realizing it. It’s like a slow and steady invasion happening right under your nose.

The Clues They Leave Behind: To catch these culprits, you’ve got to know the signs. Look out for things like discarded wings (yes, termites are not great at cleaning up after themselves), mud tunnels, and wood that sounds hollow when you tap it. These signs are like their calling cards, saying, “Hey, we’ve been here.”

Damage Control: Now, let’s talk damage. Termites can cause some serious trouble. They chew through wood, which is basically your property’s skeleton. If left unchecked, they can weaken the structure to the point where it becomes unsafe. Repairs can get expensive, and nobody wants to deal with that headache.

Early Detection is Key: Here’s the deal – early detection is your best friend when it comes to termites. The sooner you catch them, the easier it is to deal with them. That’s why having a building and pest inspection is so important. They’re like your termite radar, spotting these little critters before they turn into a full-blown disaster.

So, there you have it, termites in Ipswich – a sneaky but very real threat. Keep an eye out for those signs, and if you suspect their presence, take action pronto. It’s like having a superhero cape for your property – early detection can save the day!

  • Structural Issues – Cracks, Leaks, and More

Now, let’s talk about something you can’t afford to ignore – structural issues. These are like the skeleton of your property, and when they’re not in tip-top shape, it can spell trouble.

Common Structural Problems: During a building and pest inspection in Ipswich, one thing that often pops up is structural issues. These are like the red flags that say, “Hey, something’s not quite right.” Think cracks in the walls, ceilings, or floors. These issues can make your property less safe and might even hurt its value.

Safety and Value Impact: So, why should you worry about these problems? Well, apart from being unsightly, they can affect your property’s safety and value. Cracks and leaks can be signs of a larger issue. If not dealt with, they can lead to more significant structural damage. And nobody wants to be left with a wobbly house or a plummeting property value.

Detecting and Fixing: The good news is that there are ways to identify these issues. Look for uneven floors, doors that won’t close properly, or telltale cracks in the walls. If you spot any of these, it’s time to take action. Don’t panic, though – not all issues are deal-breakers. Many can be fixed with the right expertise.

Potential Solutions: Depending on the severity, structural problems can often be addressed with solutions like foundation repair, reinforcing weak areas, or even just fixing the cracks. The key is to catch these issues early and get professional advice.

Remember, structural issues are not something to sweep under the rug. They can have a big impact on your property’s safety and value. So, keep an eye out for those telltale signs, and when in doubt, consult an expert. It’s like giving your property a sturdy backbone – essential for a happy and safe home!

  • Plumbing and Electrical Concerns

Okay, let’s tackle the next big thing: plumbing and electrical concerns. These are like the unsung heroes of your property, quietly working behind the scenes. But when they go rogue, it’s a whole different story.

Discovering the Issues: During an inspection, plumbing and electrical problems might pop up. Leaky pipes, faulty wiring, or outdated systems are common finds. These issues are like time bombs waiting to go off.

Risks at Play: Faulty plumbing can lead to water damage and even mold growth, while electrical issues can be a fire hazard. It’s not just about inconvenience; it’s about safety. Ignoring these problems could lead to disaster.

Getting it Right: So, what can you do? The key is to address these concerns promptly. When it comes to plumbing, fix leaks, update outdated systems, and maintain your pipes. For electrical issues, consult a professional to ensure your wiring is safe and up to code.

  • Mold and Moisture Problems

Now, let’s talk about the sneaky duo – moisture and mold problems. These are like unwanted house guests that can seriously mess with your property’s health.

The Moisture-Mold Connection: Moisture issues are often the root cause of mold growth. Excess moisture can sneak into your property through leaks, poor ventilation, or even flooding. Mold loves this kind of environment.

Health Risks: Mold isn’t just unsightly; it can pose health risks. It can cause respiratory problems and allergies, making it a big no-no in your home.

Prevention and Solutions: To prevent mold, you’ll want to keep your property dry and well-ventilated. Fix leaks, use dehumidifiers, and clean up any visible mold promptly. If the issue is extensive, it’s time to call in the pros for safe removal.

  • Asbestos and Hazardous Materials

Lastly, let’s touch on a less common but important topic – asbestos and hazardous materials. These are like hidden dangers that can have long-lasting health effects.

The Hazardous Surprise: Sometimes, building and pest inspections might uncover asbestos or other hazardous materials. Asbestos, for instance, was once commonly used in construction but is now known to be dangerous.

Health Risks: Exposure to asbestos can lead to serious health issues, including lung cancer. It’s a hazard you definitely want to avoid.

Safe Handling: If asbestos or hazardous materials are found, don’t panic. Consult with experts who can safely remove and dispose of them. It’s all about ensuring your property is a safe place to live.

These concerns may not be as common as termites and structural issues, but when they do show up, they’re worth taking seriously. Remember, your property’s safety and your well-being are at stake, so stay vigilant and address these issues promptly. It’s like giving your home a clean bill of health.

5 Tips to Fix GeForce Experience Error Code 0x0003 on Windows 10

The GeForce Experience software is an integral tool for gamers who hold graphics quality and smooth performance in high regard. It optimizes game settings, updates Nvidia drivers, and even allows gamers to record gameplay. Undeniably, GeForce Experience has become a gamer’s haven, resonating with Nvidia’s deep understanding of hardware and software integration.

But with great power, comes great responsibility, or rather great complexity. Among the issues users encounter, the GeForce Experience Error Code 0x0003 is a common bug. This error makes the GeForce Experience unusable, prevents updates, and may cause gameplay to degrade due to outdated drivers.

Resolving this issue is paramount as it directly impacts user experience. This article will guide you through proven methods to fix this peculiar error and keep your game time at peak performance.

Tip 1: Restart Nvidia Services

Nvidia services are behind-the-scenes processes that ensure GeForce Experience and its underlying hardware (the GPU) function appropriately. These services are vital for the software’s functionality, reliability, stability, and related components.

To restart Nvidia services, follow the steps outlined below:

1. Press Win + R to open the Run dialog, and type in services. msc, and hit enter.

Press Win + R to open the Run dialog, and type in services. msc, and hit enter.

2. In the services window, look for all Nvidia services (they all start with Nvidia).

3. Right-click on each Nvidia service and choose ‘Restart’ if the services run. In case the service is stopped, choose ‘Start’.

Right-click on each Nvidia service and choose 'Restart' if the services run. In case the service is stopped, choose 'Start'.

4. restart your computer and check whether the GeForce Experience Error 0x0003 has been resolved.

Restarting these processes has the potential to unstick any software deadlock or conflict that could have caused the error.

Tip 2: Enable Nvidia Telemetry Container Service

The Nvidia Telemetry Container Service, a part of Nvidia’s software suite, gathers data regarding the performance and usage of Nvidia’s hardware and software. The functioning of this service is crucial for many features within the GeForce Experience.

To Enable the Nvidia Telemetry Container Service, Overseen Below:

1. Open the services window using the services.msc command as mentioned above.

Open the services window using the services.msc command as mentioned above.

2. Look for ‘Nvidia Telemetry Container’, right-click on it and select ‘Properties’.

Look for 'Nvidia Telemetry Container', right-click on it and select 'Properties'.

3. In the Properties window, set the ‘Startup type’ as ‘Automatic’ and ensure the service status is ‘Running’. If not, click on ‘Start’.

In the Properties window, set the ‘Startup type’ as ‘Automatic’ and ensure the service status is ‘Running’. If not, click on 'Start'.

4. Click ‘OK’ to save changes, restart your computer, and retry using GeForce Experience.

Click 'OK' to save changes, restart your computer, and retry using GeForce Experience.

By ensuring this service is running correctly, you strengthen the connectivity and functionality of GeForce Experience, decreasing the likelihood of the error 0x0003 occurrence.

Tip 3: Reset Network Adapter

Your network adapter, a crucial hardware component, facilitates network communication for your system. Some elements within the GeForce Experience require an active network connection, and any issues with the network adapter may result in Error Code 0x0003.

To Reset Your Network Adapter, Follow These Steps:

1. Press Win + X and select ‘Windows PowerShell (Admin)’ or ‘Command Prompt (Admin)’.

Press Win + X and select 'Windows PowerShell (Admin)' or 'Command Prompt (Admin)'.

2. Type netsh winsock reset and press enter.

Type netsh winsock reset and press enter.

3. Once the command executes successfully, restart your computer.

You can eliminate any network issues causing the GeForce Experience Error Code 0x0003 by resetting your network adapter.

Tip 4: Update GeForce Experience

Keeping your software updated is crucial in maintaining a functioning, efficient system. Updating GeForce Experience refreshes your software settings, rids your system of outdated files, and introduces new features and improvements that can resolve existing conflicts or issues, such as the dreaded Error Code 0x0003.

Here is a Simple Procedure on How to Update Geforce Experience:

  1. Open GeForce Experience software.
  2. Click on the ‘Drivers’ tab in the top left and choose ‘Check for updates’.
  3. If an update is available, follow the on-screen instructions to download and install the update.

Updating the GeForce Experience can significantly enhance its performance and stability, and resolve issues linked with outdated software.

Tip 5: Reinstall GeForce Experience

A fresh reinstallation of the GeForce Experience program eliminates any deep-seated corruption, malfunctions or conflicts related to previously installed GeForce Experience files. This process purges all data and settings related to GeForce Experience, and re-starts with a clean slate, effectively minimizing the chance of the 0x0003 error occurrence.

To Reinstall Geforce Experience, Follow These Steps:

1. Navigate to ‘Control Panel > Programs and Features’, find ‘GeForce Experience’ in the list, right-click and select ‘Uninstall.’

2. Restart your computer after the uninstallation.

Restart your computer after the uninstallation.

3. Visit the official Nvidia website and download the most recent version of GeForce Experience.

Visit the official Nvidia website and download the most recent version of GeForce Experience.

4. Run the installer, following its prompts to complete the installation.

Run the installer, following its prompts to complete the installation.

Reinstallation is more drastic and often resolves persistent issues like the 0x0003 error by resetting the software to its original state.

Impact of The GeForce Experience Error Code 0x0003 on Users

GeForce Experience has revolutionized gaming by enhancing graphics processing and providing smooth gameplay. However, encountering the GeForce Experience Error Code 0x0003 can significantly disrupt those benefits.

Disruption of Gameplay

The primary impact of this error is the interruption of gameplay. Games suddenly seem to lose the smooth execution they had before the error occurred. From slow response times to less sharp graphics, the enhanced user experience that the GeForce software promises gets compromised.

Loss of Functionality

A noteworthy impact of this error is the loss of the GeForce Experience features. Users may be unable to use game optimization features, automatically update Nvidia drivers, or record their gameplay — all vital facets that enrich the gaming performance.

Challenge in Troubleshooting

The error may pose a challenge for users who lack technical expertise. As a result, users have to grapple with a diminished gaming experience and the daunting task of troubleshooting the error.

Importance of Fixing the Geforce Experience Error Code 0x0003

Given its disruptive effects, resolving the Error Code 0x0003 becomes paramount for returning to an optimal gaming experience.

Restoring Optimal Performance

Addressing and fixing this error restores your gaming system’s performance, stability, and reliability. Once fixed, gamers can return to smooth and uninterrupted gameplay, capturing their best gaming moments, and automatically keeping their system drivers updated.

Unlocking Full Feature Set

Resolving the Error Code 0x0003 re-enables the myriad features offered by GeForce Experience. From optimal game setting configurations to seamless driver updates and recording gameplay, the functionality returns with remediation of the error.

Preventing Future Problems

An unaddressed error can cause more problems down the line. By proactively fixing Error Code 0x0003, users can prevent further system complications or errors.

Peace of Mind

Last but not least, fixing the error allows users to focus on what’s important – enjoying their gaming experience. After all, knowing your system is functioning as expected, and any software glitches have been addressed, you can game with peace of mind.

Frequently Asked Questions (FAQs)

1. What is Geforce Experience?

GeForce Experience is an application developed by Nvidia that optimizes your game settings, keeps your drivers up to date, and allows you to record and share gameplay.

2. What is the Geforce Experience Error Code 0x0003?

The Error Code 0x0003 is a common problem that makes GeForce Experience unusable. It often prevents updates and may cause gameplay performance to degrade due to outdated drivers.

3. Can a Virus or Malware Cause the Geforce Experience Error Code 0x0003?

While not common, a virus or malware infection can cause this error. This is why scanning your system using a reliable antivirus tool can be beneficial.

4. Can Outdated Drivers Cause the Geforce Experience Error Code 0x0003?

Whether related to Nvidia or other hardware, outdated drivers can lead to this error. Keeping your drivers updated is essential in maintaining the health of your system and software like GeForce Experience.

5. Can I Resolve the Error Code 0x0003 by Reinstalling Geforce Experience?

Yes, but it should be the last resort when other fixes fail. Reinstallation clears all data and settings related to GeForce Experience, often resolving lingering issues like Error Code 0x0003.

Conclusion

Maintaining any software’s optimal working condition requires consistent effort, and GeForce Experience is no exception. This article taught you about the GeForce Experience Error Code 0x0003 and how to tackle this issue effectively. These range from restarting your Nvidia services, enabling the Nvidia Telemetry Container Service, resetting your network adapter, updating GeForce Experience, or as a last resort, reinstalling the software.

Don’t feel left in the dark if these solutions do not solve your problem. Each situation is unique, and so is each solution. You can seek help from qualified professionals or online communities, where members or representatives of Nvidia often post solutions to common issues, or you can start a thread discussing your issue, inviting others to chime in with their expertise or similar experiences.

Remember, the aim is to ensure an enhanced and smooth user experience. It’s time you took control and banished the Error Code 0x0003 to where it belongs, in the annals of forgotten glitches. Go ahead, your ultimate gaming experience awaits.

How To Balance Being a Homeowner and College Student

0

Homeownership and College Life

Whether by choice or necessity, many college students find themselves thrust into the role of homeowner. The demands of maintaining a home while juggling coursework can be overwhelming. Understanding how to balance these responsibilities is key to achieving both academic success and a comfortable living environment. This article provides insights and practical tips to guide you through this journey.

Understanding the Complexity of Balancing Homeownership and Academia

Understanding the Complexity of Balancing Homeownership and Academia

Homeownership, admittedly, comes with a slew of worries such as handling repairs, paying mortgages, and overall property maintenance. These can often conflict with the academic rigors of college life. The balancing act requires understanding the full breadth of duties that come with both roles and devising strategies to meet these responsibilities without jeopardizing the other. Efficient organization and time management become integral to this endeavor. Juggling between academia and homeownership may seem daunting but with the right approach, it is achievable.

One great option to assist you is opting for an online degree program, like this English language teaching degree program. Online degree programs provide the flexibility needed to manage both homeownership and academics effectively. With online courses, students have the freedom to create a schedule that works best for them. This means they can conveniently fit their coursework around their homeownership duties. Specifically, a master’s degree in literacy and second language studies provides individuals with a strong foundation to work in various capacities within the field of language education and linguistics.

Managing Time Efficiently: Strategies for Multiple Responsibilities

Time management stands as a fundamental component in the quest to successfully balance homeownership and college life. Develop a structured routine that allocates specific time for studying, attending lectures, and handling home-related responsibilities. This simply structured regime can prevent either aspect of your life from being neglected. Modern technology also provides numerous tools and applications designed to aid in time management. Using these resources to keep track of your tasks can reduce the pressure. The key is consistency. It may take time to adjust to your new schedule. Don’t be too hard on yourself if you stray every once in a while.

Financial Planning: Cutting Costs and Budgeting for Success

Financial Planning: Cutting Costs and Budgeting for Success

Financial constraints pose one of the most pressing challenges for homeowner students. Balancing tuition fees, book costs, upkeep, utilities, and groceries can be taxing for any student. Cutting costs where possible is essential. One area of potential saving is through investing in energy-efficient solutions for homes, like using LED bulbs. It cuts down utility costs in the long run, leaving more room in your budget for other necessities.

Another cost-cutting measure includes sourcing affordable or second-hand textbooks as opposed to buying brand-new ones. Always ensure to set aside funds for unexpected expenses such as home repairs. Financial advisors can offer guidance in creating a realistic and flexible budget.

Leveraging Resources: Tools for Homeowner Students

Leveraging Resources: Tools for Homeowner Students

There are numerous resources designed specifically to aid homeowner students in their unique situations. Several organizations and institutions offer grants, scholarships, and loans tailored to such students. Websites dedicated to providing budget-friendly home improvement ideas also abound. Also, consider investing in quality residential awnings to enhance your home’s exterior while providing efficient weather protection.

In academia, online resources such as research databases, learning platforms, and networking forums can lessen your academic load. Don’t shy away from seeking the help you need. Remember, the goal is to make your homeownership and college life as manageable and rewarding as possible.

Self-care and Tips for Balancing Studies and Property Ownership

Self-care and Tips for Balancing Studies and Property Ownership

Homeownership and academia each come with their level of stress. Combined, they can become even more overwhelming. It’s crucial to find ways to decompress and manage stress. Maintain a healthy lifestyle by eating well, getting enough sleep, and incorporating regular exercise into your routine. Take advantage of your college’s mental health resources. Many colleges offer free counseling services for students. Talking to a professional can provide helpful strategies for managing your stressors. Always try to keep a positive outlook. Balancing homeownership and college life will undoubtedly have its challenges, but the experience is also rewarding and character-building.

In conclusion, managing the responsibilities of homeownership and earning a degree is not an easy task but it is achievable with the right strategies. By efficiently managing your time, budgeting wisely, leveraging available resources, and looking after your mental health, you can successfully navigate the world of academia while maintaining a comfortable and well-managed home. Follow this advice and you’ll be able to take the best possible care of yourself and your home.

Comparing Different Types of Area Charts and Their Applications

0

Area charts are essential components in data visualization, providing salient insights into trends and patterns over time. They also help in demonstrating differential elements like volume and price movements. Understanding the distinctions between the various types and their diverse applications is crucial for optimal data analysis. Below, we delve deeper into understanding these confounding chart types.

Understanding Area Charts: A Complete Guide

The fundamental concept of an area chart revolves around representing quantitative data graphically. It is about visualizing volumes of data over a given period, enabling viewers easily to comprehend the trends, surges, or declines.

In essence, area charts emphasize the magnitude of change over time, and how one category is distinguished from the others. They are effective in showcasing stacked or overlapping data, giving an overall view of various data categories simultaneously.

Area charts are typically represented in two main types; stacked and non-stacked charts. Stacked area charts bundle up different categories to give an all-encompassing view, while non-stacked ones distinctly represent every category.

Ultimately, a basic understanding of area charts sets the foundations for how to accurately utilize them. Knowing when to use stacked or non-stacked versions can significantly aid in maximizing analytic results.

Breakdown of Various Types of Area Charts

A deep dive into the various types of area charts offers clarity in their applicability. With the regular area chart, often single or multi-area, the primary focus is illustrating how specific categories contribute to the entire data over time.

The stacked area chart, on the other hand, sheds light on overall trends while also displaying categorical trends, easily showcasing cumulative totals. These work best when comparing part-to-whole relationships in your data.

In a percentage area chart, every category is represented as a percentage of the total, useful in understanding each category’s proportion to the whole over different periods.

In terms of a range (or Area Range) area chart, it’s best defined by having two Y axes, showing the difference between data sets and used to showcase the variability of the data.

Unpacking the Applications of Area Charts in Data Visualization

A man working at a desk with several desktop monitors showing data visualization tools

Unquestionably, area charts reign supreme when it comes to representing volume changes over time, alongside visualizing multiple series. Industries like finance and meteorology heavily lean on them to predict and display patterns or trends.

In the market trading sector, these graphs are handy in showcasing the price movement of securities, stocks, and shares over specified periods. They provide a visual representation of the general performance mismatches like share price and volumes.

The health sector maximizes the use of area charts in visualizing vital records over time, such as patients’ records or coronavirus cases rising and falling.

Generally, the application of area charts bridges the gap in understanding data patterns, providing a reliable and easy-to-read data visualization.

Tips for Choosing the Right Area Chart for Your Needs

- A desktop computer monitor displaying a variety of charts including area charts

Choosing the right area chart heavily depends on the specific need one is trying to fulfill. For instance, if you want to represent one category of data and its changes over time, then a basic area chart will be the most suitable.

Should you need to represent several categories, both in their individual growths and an overall combined view, a stacked area chart should be your go-to option.

A percentage area chart will serve you best if your interest leans more toward understanding the proportion of every category to the total over different periods.

Altogether, your choice for an area chart rests heavily on the data you have, the information you want to extract from it, and ultimately how you hope to visualize this information.

Overall, area charts are indispensable in data visualization, offering unparalleled clarity and ease of understanding trend-focused data. Understanding their types and where to use each allows you to unlock their potential fully and grasp their influential power in the data analysis realm.

Seeking Justice: How Houston Catastrophic Injury Lawyers Can Help

0

Life can take an unexpected turn in the blink of an eye. Accidents happen, often causing severe, life-altering injuries that can turn a person’s world upside down. In these challenging times, when everything seems uncertain, Houston Catastrophic Injury Lawyers provide hope and support. With their extensive knowledge and experience, they guide victims and their families through the complex legal landscape, ensuring that justice is pursued and rightful compensation is sought.

From navigating insurance claims to negotiating settlements, these dedicated lawyers are there every step of the way, advocating for the rights and well-being of their clients. With their compassionate approach and unwavering commitment, they strive to bring solace and a sense of closure to those affected by catastrophic injuries.

Amputation

Imagine losing a limb in an accident. The emotional trauma is unimaginable, and the physical pain is unbearable. Houston catastrophic injury lawyers step in here, offering legal aid to those who have undergone amputation due to negligence or accidents. They fight for compensation that covers medical expenses, rehabilitation costs, and emotional distress.

Back & Spinal Cord Injuries

Severe back and spinal cord injuries can lead to paralysis, disrupting lives and leaving victims dependent on others. Skilled lawyers can help these victims secure compensation that ensures they receive the best medical care and support for their new lifestyle.

Burn Injuries

Burn injuries are physically painful and leave scars that remind victims of their ordeal every day. Legal professionals in this field understand the intricacies of such cases and work relentlessly to get these victims the justice they deserve.

Slip and Fall

Accidents as seemingly simple as a slip and fall can result in catastrophic injuries. Houston catastrophic injury lawyers know how to navigate these cases, helping victims receive compensation for their medical bills, lost wages, and more.

Maritime Injuries

The maritime industry poses unique risks. From burns and explosions to paralysis and traumatic brain injuries, maritime workers face many dangers. Lawyers experienced in maritime law can help victims navigate these complex cases, fighting for their rights under the Jones Act.

Oil Rig and Refinery Explosions

Explosions at oil rigs and refineries can be devastating, causing severe injuries or even death. Legal experts understand the dangers and complexities of the oil and gas industry. They are committed to helping victims and their families navigate the aftermath of such disasters.

Drilling Rig Accidents

Drilling rig accidents can be catastrophic, resulting in severe injuries or fatalities. Houston catastrophic injury lawyers have the expertise to deal with these complex cases, helping victims and their families seek justice and compensation.

Workplace Accidents and Wrongful Death

Workplace accidents can lead to life-altering injuries or even wrongful death. In such cases, lawyers can help victims and their families seek justice, ensuring they receive compensation to cover medical expenses, loss of income, and other damages.

Insurance Disputes

After a catastrophic injury, a victim’s last need is a dispute with the insurance company. Skilled lawyers can step in, representing the victim’s interests and ensuring they get the compensation they deserve.

Harnessing the Power of Houston Catastrophic Injury Lawyers for Justice and Compensation

In conclusion, Houston catastrophic injury lawyers play a crucial role in seeking justice for victims of severe accidents. They provide much-needed support, guidance, and representation, helping victims navigate the complex legal landscape.

When life takes an unexpected turn, remember you don’t have to face it alone – qualified legal help is available to assist you in your quest for justice. We hope this info has been helpful, and thank you for reading.

5 Best SEO Companies for DUI Law Firms

Various reasons exist why reputable attorneys specializing in driving under the influence need SEO services. At first, digital marketing and the legal industry may seem not to be connected, but they actually are.

Getting your website shown on the first page and at the top of the results on Google or Bing can bring in more customers and revenues. It’s all about making sure that you’re getting discovered when someone searches for a drunk driving lawyer or DUI attorney.

People are now relying on online if they need help or advice. Someone who’s being charged with a DUI offense may feel too overwhelmed and stressed, and they don’t have the time to compare the offers out there. Instead, what they do is call the first attorney that they see online, and this is where you need to strive harder for the best results.

Reach more people searching specifically for DUI attorneys while establishing more credibility and trustworthiness. Higher rankings will mean that you’ll be seen as an authority in your niche. If you want to get results, here are some of the best options for you.

  1. Chicago SEO Scholar

Services like keyword research, where the experts are going to identify the best terms that are related to your business, are going to be expected. Posts or content optimization will ensure that the firms are going to implement the strategies that work.

Various records of success, competitive pricing, and a strong passion for executing the best white hat tactics are setting these companies apart. See more about their packages and offerings through sites like www.chicagoseoscholar.com/law-firm-seo/ and see if they can do something for you to make your platform more user-friendly. 

Make changes to your meta tags, headers, and image alt text to make them more accessible, and the pros will build a site structure that will work for you in the long run. See more about them on the following:

Chicago SEO Scholar

55 E Monroe St Suite 3800 Chicago, IL 60603

(312) 529-8226

https://www.chicagoseoscholar.com/law-firm-seo

  1. LawRank

Focusing on small to medium-sized businesses is this company’s specialty, where they provide tailored services for attorneys that may specialize in various niches. They can handle immigration, estate planning, personal injury, trust and probate, etc.

Experts who have extensive experience in the field and who have worked with countless professionals can provide you with customized content strategy, link building, ad campaigns, research, and other cutting-edge technologies so you can set yourself apart from others.

Client reviews speak highly of their professionalism and results-oriented approach, and many have reported significant improvements in their website’s rankings and increased organic traffic after working with the pros in this field. See more about the rankings on this webpage.

  1. Comrade SEO Agency

Composed of professionals who are well-versed in building websites, creating content, and reading reports, you can get insights from them on how to make more improvements on your site. They will also offer pay-per-click campaigns, web development, and other practices that will meet the needs of your market.

Personalized attention is also welcome, where the results-driven experts are not going to quit until they get what they are aiming for. You can count on them to thoroughly analyze the search behavior and patterns of potential clients looking for DUI legal assistance, allowing them to identify the most relevant keywords to target on their clients’ websites. 

A team of writers is going to produce high-quality, informative content such as blog posts, articles, and FAQs that not only educate readers but also establish their clients as someone who has the authority in the case that they’re facing. Hence, this is definitely a good move for the attorneys.

  1. iLawyer Marketing

Top agencies like this one can help clients achieve the specific results that they are looking for. Skilled digital marketing agencies can have a comprehensive suite of offerings and a proven track record, and they have earned a spot among the top SEO companies in this niche. 

Tailored campaigns, custom analysis reports, and identifying relevant search terms are just some of the things that you can expect from them. Find them to be a perfect fit because they don’t tend to enter into long-term contracts, but they only work with a specific number of law firms so that they can provide a better and more personalized service.

  1. Custom Legal Marketing

Family law, criminal defense, and other specializations are what you can expect from these SEO strategists. Climb on the top and be more visible to your potential clients so you can increase your conversions and generate meaningful web traffic.

Find out more about the teams that have over a decade’s worth of experience in the industry, and they can offer a marketing campaign related to civil litigation if you need it. Their recommendations are extremely detailed, and the results are measurable. They will also have ongoing analysis and forecasts so you can make changes accordingly.

What Are The Most Common Problems When Taking A Driving Test?

Obtaining a driver’s license is a rite of passage for many individuals, symbolizing newfound independence and mobility. However, before one can legally take to the roads, they must pass a driving test. Road tests, conducted by government authorities or accredited institutions, assess an individual’s ability to operate a motor vehicle safely and responsibly. While these tests are essential for road safety, they can be anxiety-inducing for many aspiring drivers. 

In this detailed guide, we explore individuals’ most common problems when taking a road test and offer practical tips to overcome them.

Challenges when Taking A Driving Test

Some challenges when people are taking a driving test include:

1. Nervousness and Anxiety

Nervousness and Anxiety

Nervousness and anxiety are perhaps the most universal issues encountered during a 路試. The pressure to perform well in front of an examiner can be overwhelming, leading to shaky hands, sweaty palms, and impaired judgment. This anxiety can affect a person’s driving skills and decision-making abilities.

Tip: To combat nervousness, practicing as much as possible before the test is crucial. Familiarity with the vehicle and the test route can boost your confidence. Deep breathing exercises and positive self-talk can also help alleviate anxiety on the test day.

2. Lack of Preparedness

Lack of Preparedness

One of the most common reasons for failure in road tests is a lack of preparation. Many aspiring drivers underestimate the importance of thorough preparation, which involves understanding road rules, practicing driving maneuvers, and being well-acquainted with the vehicle they’ll be tested in.

Tip: To overcome this problem, enroll in a driver’s education program for professional training. Study the driver’s manual and take practice tests to ensure you have a solid grasp of the rules of the road. Additionally, practice driving in various conditions and different types of traffic to build your confidence.

3. Poor Observation Skills

Poor Observation Skills

Road tests assess your ability to operate a vehicle and your observation skills. Many candidates fail their tests because they overlook crucial details, fail to check blind spots, or neglect to use mirrors effectively.

Tip: Improve your observation skills by practicing the “SEE” method – Search, Evaluate, and Execute. Continuously scan your surroundings, use mirrors frequently, and always check blind spots before changing lanes or making turns.

4. Failing to Yield Right of Way

Failing to Yield Right of Way

Failing to yield the right of way is a common mistake road test takers make. This error can lead to accidents and is critical in determining whether a candidate passes or fails their test.

Tip: Study and understand the rules regarding the right of way in your region. Practice scenarios where you must yield and habitually do so even if you’re unsure. Remember that safety should always be your top priority.

5. Speed Control

Speed Control

Maintaining appropriate speed is essential during a road test. Many candidates struggle with driving too fast or too slow, which can lead to unfavorable outcomes.

Tip: Practice maintaining a consistent and safe speed. Pay attention to speed limits, especially in school zones and residential areas. Use your vehicle’s speedometer as a guide and adjust your speed accordingly.

6. Parking Problems

Parking Problems

Parking can be a stumbling block for many test-takers, especially parallel parking. It requires precision, spatial awareness, and practice to execute correctly.

Tip: Practice parallel parking in various locations to become comfortable with the maneuver. Use cones or markers to create a simulated parking space and practice until you can do it confidently. Don’t forget to use your mirrors and turn signals appropriately while parking.

7. Ignoring Traffic Signs and Signals

Ignoring Traffic Signs and Signals

Ignoring traffic signs and signals is a major road test failure. This includes running red lights, failing to stop at stop signs, and disregarding other essential road signs and signals.

Tip: Pay close attention to all traffic signs and signals on the road. Always come to a complete stop at stop signs and wait for a green light at traffic signals. Ignoring these basic rules can have serious consequences.

8. Overconfidence

Overconfidence

While underconfidence can be detrimental, overconfidence can also lead to mistakes during a road test. Some candidates believe they know everything and become complacent, leading to errors in judgment.

Tip: Strike a balance between confidence and caution. Acknowledge that there’s always something new to learn about driving, and approach the test with a mindset of continuous improvement.

9. Distractions

Distractions

Distractions are a growing road problem that can significantly impact your performance during a road test. Distractions can lead to accidents and test failure, whether texting, adjusting the radio, or engaging in conversation.

Tip: Before the test, ensure that your vehicle is free from distractions. Turn off your phone, keep the radio volume at a minimum, and focus solely on driving. Your full attention should be on the road and the tasks at hand.

10. Poor Defensive Driving Skills

10. Poor Defensive Driving Skills

Road tests emphasize the importance of defensive driving, which involves anticipating and reacting to potential hazards. Candidates who lack these skills may fail their tests due to unsafe driving practices.

Tip: Practice defensive driving techniques by keeping a safe following distance, scanning the road ahead, and being prepared to react to unexpected situations. Demonstrate your ability to make safe decisions while driving.

Conclusion

Passing a road test is a significant achievement requiring knowledge, skills, and confidence. Understanding the common problems faced during a road test and taking proactive steps to address them can greatly improve your chances of success. Remember that practice, preparation, and a focus on safe driving are key factors in passing your road test and becoming a responsible and competent driver. By acknowledging and addressing these common issues, you can confidently approach your road test and increase your chances of earning your driver’s license.

Distinguishing Myths from Facts: Understanding Lab Grown Diamond Rings

0

In the world of fine jewelry, lab-grown diamond engagement rings have been gaining significant attention and popularity in recent years. These exquisite gems are often touted as ethical, eco-friendly, and cost-effective alternatives to traditional mined diamonds. However, as with any emerging trend, several misconceptions and myths surrounding lab-grown diamonds can obscure their true value and significance. 

This article will delve into the world of lab-grown diamond engagement rings, exploring the science behind them, debunking common myths, and shedding light on why they have become a compelling choice for modern couples.

The Science Behind Lab-Grown Diamonds

The Science Behind Lab-Grown Diamonds

Before delving into the myths and facts surrounding lab grown diamond engagement rings, it is essential to understand the science that underpins their creation. Lab-grown diamonds, also known as synthetic or cultured diamonds, are produced through a process known as chemical vapor deposition (CVD) or high-pressure, high-temperature (HPHT) methods. These processes replicate the conditions deep within the Earth’s mantle where natural diamonds are formed.

Myths And Facts About Lab Grown Diamonds

Myths And Facts About Lab Grown Diamonds

1. Myth: Lab-Grown Diamonds Are Not Real Diamonds

One of the most common myths about lab-grown diamond engagement rings is that they are not “real” diamonds. Lab-grown diamonds share the same chemical composition and crystal structure as mined diamonds, making them indistinguishable from natural diamonds to the naked eye. Both natural and lab-grown diamonds are composed of carbon atoms arranged in a cubic crystal lattice, giving them exceptional brilliance and durability.

2. Fact: Lab-Grown Diamonds Are Ethical and Conflict-Free

One of the most compelling reasons to choose a lab-grown diamond engagement ring is its ethical and conflict-free nature. Unlike mined diamonds, associated with human rights abuses and environmental damage in some regions, lab-grown diamonds are produced in controlled laboratory settings. This means there is no risk of purchasing a diamond that has contributed to unethical practices or armed conflicts.

3. Myth: Lab-Grown Diamonds Are Cheap and Inferior in Quality

It is a common misconception that lab-grown diamond engagement rings are cheap and of lower quality than their mined counterparts. While it is true that lab-grown diamonds are often more affordable than natural diamonds, this does not necessarily mean they are of inferior quality. Lab-grown diamonds can exhibit the same exceptional clarity, color, and brilliance as mined diamonds. The lower price is often attributed to the reduced costs associated with the production process and the absence of mining expenses.

4. Fact: Lab-Grown Diamonds Are Eco-Friendly

Another significant advantage of lab-grown diamond engagement rings is their eco-friendliness. Traditional diamond mining can harm the environment, including deforestation, soil erosion, and habitat destruction. In contrast, lab-grown diamonds require significantly fewer resources and produce fewer carbon emissions. Additionally, some lab-grown diamond producers are committed to using renewable energy sources in manufacturing, reducing their environmental footprint.

5. Myth: Lab-Grown Diamonds Lack Rarity and Sentimental Value

Some people believe that lab-grown diamonds lack natural diamonds’ rarity and sentimental value. While it is true that natural diamonds are formed over millions of years and are relatively scarce, the emotional significance of a diamond is a personal matter. Lab-grown diamond engagement rings can hold just as much sentimental value as mined diamonds, as they symbolize love, commitment, and the journey of a relationship.

Choosing Lab-Grown Diamond Engagement Rings

Choosing Lab-Grown Diamond Engagement Rings

Now that we have clarified some of the myths and facts about lab-grown diamond engagement rings, let’s explore why they have become a compelling choice for modern couples.

1. Affordability and Value

Lab-grown diamonds offer exceptional value for money. They are typically priced lower than natural diamonds of similar quality, allowing couples to allocate their budget to other aspects of their wedding or future together. The affordability of lab-grown diamonds makes high-quality, larger-carat stones accessible to a wider range of individuals, enabling them to create the ring of their dreams without breaking the bank.

2. Customization

Lab-grown diamond engagement rings are often designed with a high degree of customization in mind. Couples can choose from various shapes, sizes, and settings to create a unique piece that reflects their style and story. Whether it’s a classic round brilliant-cut diamond or a fancy-colored diamond, lab-grown diamonds offer a wide range of options for customization.

3. Ethical and Environmental Considerations

Many couples today are conscious of their choices’ impact on the world. By selecting lab-grown diamond engagement rings, they can stand against unethical mining practices and contribute to a more sustainable future. This ethical and environmental consciousness aligns with the values of many modern couples who want their love to be a force for positive change.

4. Exceptional Quality

Lab-grown diamonds are not only cost-effective but also offer excellent quality. They are virtually identical to natural diamonds in terms of appearance and durability. This means that couples can enjoy the beauty and brilliance of a genuine diamond without compromising on quality or authenticity.

5. Future Innovations

As technology advances, the quality and availability of lab-grown diamonds continue to improve. Manufacturers are constantly refining their processes to produce even more exquisite diamonds, providing couples with increasingly appealing options for their engagement rings. This constant innovation ensures that lab-grown diamonds remain a compelling choice for years.

Conclusion

Lab-grown diamond engagement rings are a modern and ethical alternative to traditional mined diamonds. By debunking common myths and highlighting the facts about these exquisite gems, it becomes clear that they offer numerous benefits, including affordability, customizability, ethical and environmental considerations, and exceptional quality.

The choice between lab-grown and natural diamonds ultimately comes from personal preferences and values. For many couples, lab-grown diamonds allow them to celebrate their love in a way that aligns with their ethical and environmental beliefs while enjoying a stunning, high-quality diamond that symbolizes their commitment.

In the world of lab-grown diamond engagement rings, the myths are overshadowed by the facts, making these gems an attractive and meaningful choice for couples embarking on the journey of a lifetime together. As the jewelry industry continues to evolve, lab-grown diamonds are likely to play an increasingly prominent role, offering couples a beautiful and responsible option to mark their love and commitment.

Understanding Fax API: The Secure Faxing Tool You Should Be Using

0

Finding dependable and secure business tools in the rapidly evolving digital landscape can be challenging. Innovative companies soon developed a fax API, unlocking a streamlined, secure business communications world. Though seemingly antiquated, Faxing has endured the test of time and become increasingly pivotal with technological advancements. This is where Fax API comes into play. Keep reading to understand more.

The Advent of Fax API in Modern Business Communication

Four businesswomen having successful communication

As businesses began to migrate their operations online, a tool that could expedite fax communications while maintaining security was an unspoken need. Pharmaceuticals, health care, and law enforcement industries were among the first to recognize and incorporate Fax API into their workflows.

By leveraging this tool, businesses could send and receive faxes via digital platforms, rejigging the conventional facsimile transmission process. This introduction signaled the beginning of a more efficient, reliable, and safe method of sharing documents.

The most significant change implemented with the advent of Fax API was the incorporation of business operations into a unified, manageable framework. This brought about swift communication, ensured data integrity, and provided a significantly improved mode of communication.

Understanding the Functionality of Fax API

As a software interface, Fax API genericizes the communication protocol for fax hardware. It enables developers to integrate fax functionality directly into native business software or applications, thereby simplifying the entire faxing process.

Fax API operates based on standard HTTP protocols, making it compatible with numerous platforms. It handles all areas of the fax process, from document conversion to transmission and everything in between. The seamless integration into business applications saves time and reduces the risk of errors.

Being cloud-based, Fax API doesn’t require any physical infrastructure or software installation. This eliminates downtime and maintenance-associated costs. Through a simple click, users can send or receive faxes without leaving their primary work interface.

The greatest strength of Fax API is it transforms data into a secure communication format, using encryption protocols. This guarantees the confidentiality and authenticity of the transmitted information, a crucial benefit in today’s cyber-threat-rich landscape.

Security Revelations: How Fax API Ensures Safe and Secure Faxing

A lock stood on a laptop keyboard
A lock stood on a laptop keyboard.

The Fax API operates on stringent security protocols to ensure the integrity and security of data transmitted across networks. This high level of data protection is particularly advantageous for industries handling sensitive or personal data like healthcare and financial services.

The send process encapsulates faxes into HTTPS or SSL encryption, thereby providing a strong defense against malicious threats. In addition to this, Fax APIs utilize firewalls, intrusion detection, and prevention systems to provide robust security.

By integrating Fax API, businesses can track and audit data transmission, complying with industry-specific regulations. Updates on Fax API also mean companies can stay abreast with the latest security technologies.

Some Lasting Benefits of Fax API

As businesses increasingly digitize operations, integrating Fax API can render numerous advantages. Chiefly among these are improved process efficiency, time-saving, and cost-efficiency.

Businesses don’t need separate software to send a fax; they can do this directly from their existing applications because of Fax API. This saves time and reduces the risk of lost documents, contributing to overall productivity.

With no hardware or software requirements, Fax API eliminates capital expenses, resulting in cost savings for businesses. Its cloud-based nature also means lower maintenance and zero downtime, further adding to its cost-effectiveness.

Altogether, Fax API is changing the face of business communication by securely facilitating the exchange of documents. Its advent has revolutionized operations in many professional arenas.

The Role of Technology in Proposal Management: How a Proposal Management Tool Can Help

0

Proposal management is an integral aspect of business operations, often dictating the success of business ventures. The process involves creating, managing, and tracking project proposals geared toward convincing clients or stakeholders. Technology has revolutionized this process in recent years, making it more streamlined and efficient. This article will explore how a proposal management tool can impact business operations. Keep reading to learn more.

Understanding the Role of Technology in Proposal Management

Technology has remarkably upgraded proposal management by introducing innovative solutions such as the proposal management tool. With these solutions, businesses can minimize human error, enhance accuracy, and boost the speed of proposal creation and processing.

The application of technology in proposal management has automated mundane tasks, creating opportunities for strategic thinking and consolidation. It has also brought about improved communication, better document storage, and easier accessibility of resources needed for proposal management.

Another significant role of technology in proposal management is system integration. Advanced proposal management tools can integrate with other systems, helping to harmonize processes for optimal functioning.

These technological advancements create a more profitable and productive business environment by making proposal management more straightforward and efficient.

Key Features of a Proposal Management Tool

Alt text: Two people looking at computer screens, discussing the benefits of using a proposal management tool.

Several key features characterize a robust proposal management tool. One of these is automation capability. This feature helps automate tasks, including proposal generation, follow-ups, tracking, and closing deals.

Another highlight of an effective proposal management tool is its ability to accommodate collaboration. This feature allows team members to collaborate in real-time, boosting productivity seamlessly.

Data analysis is an important feature of a functional proposal tool. The tool can generate insights from proposal data through this feature, helping the team make data-driven decisions.

How a Proposal Management Tool Enhances Efficiency in the Proposal Process

A proposal management tool improves efficiency in the proposal process in several ways. One of these is reducing manual labor through automation, reducing errors, and heightening productivity.

Businesses can cut downtime associated with creating, reviewing, and approving proposals with a proposal tool. As the software handles administrative tasks, businesses can focus more on proposal content and strategy.

Additionally, proposal management tools provide clear overviews of the proposal process. With comprehensive dashboards and real-time notifications, tracking progress and making necessary adjustments is possible, enhancing efficiency.

Most notably, with a proposal management tool, businesses can standardize their proposal processes. This ensures consistency and establishes a replicable process that optimizes efficiency.

Exploring the Benefits of a Proposal Management Tool for Remote Teams

Alt text: A team sitting around a table with laptops learning about the benefits of using a proposal management tool.

The use of proposal management tools by remote teams offers numerous benefits. Among the advantages is enhanced collaboration. Even across distances, team members can work together seamlessly, building and reviewing proposals.

The role of a proposal management tool extends to tracking and managing tasks efficiently. This ensures that everyone is kept informed about ongoing projects and tasks regardless of where team members are located.

Case Study: The Transformational Use of Proposal Management Tools in Business

The transformational use of proposal management tools in business can be seen in various case studies. For instance, a company experienced significant growth after implementing proposal management software. This was evident from their improved proposal win rates and increased productivity.

Another instance is a company that previously struggled to onboard new employees into their proposal processes. With the introduction of a proposal management tool, this process was streamlined, resulting in quicker onboarding and enhanced performance.

In another case, a company used a proposal management tool to manage multiple proposals across different departments. Not only did the tool enhance collaboration, but it also led to a faster approval process, saving the company valuable time.

These case studies provide a glimpse into the transformative power of proposal management tools in business. The benefits extend to improving proposal processes, enhancing team collaboration, and driving business growth.

How To Reduce Lag On Your Gaming 

0

There is nothing more frustrating than lag when gaming – it always seems to happen at the worst possible moment! Video games are immersive and engaging, so you are suddenly taken out of this world when the game lags. Additionally, many games require careful concentration and accuracy, which can make them nearly impossible to play if the action keeps freezing. So, what can you do to reduce lag while gaming? Fortunately, you can do many things that will make a big difference to your gaming experience. By combining these together, you should create a smoother experience and avoid the frustration of lag. 

Check Your Connection

First, you should check your internet connection. Often, lag occurs due to a poor internet connection or a lack of sufficient bandwidth. A wired Ethernet connection can make a big difference if this is possible. If your internet plan is too slow, you will need to upgrade that will be able to meet the demand of online gaming. 

Upgrade Hardware

You may also need to upgrade your hardware for a smoother gaming experience – this could be the problem if your gear is several years old! You can upgrade your CPU, GPU, and RAM to reduce lag, as well as update your graphics drivers. 

Use SSD 

If you are using a traditional hard disk drive (HDD), you can improve the performance of any game by upgrading to a solid-state drive (SSD). SSD uses flash memory instead of spinning disks to store data, making loading times and performance significantly faster.  

Adjust Settings

You might find that you are able to adjust in-game settings to reduce lag. Finding the balance between visuals and performance is key, so you may need to experiment. If you are playing online slot games at places like Spin Casino, you could benefit from adjusting the settings. Casinos like this have a wide range of colorful slot games with bold graphics and slick visuals, so making a few adjustments could improve your gaming experience. This casino also has an app (for Apple and Android) that might reduce your lag time depending on the rest of your setup. These casinos offer video slot games that can create a more engaging experience, so you will not want to experience any kind of lag. 

Close Background Apps

A simple yet effective way to create a smoother gaming experience is to close any background applications that you have running. When you have apps running in the background, it can drain resources that can impact the performance of your game. Closing these apps will free up resources and prevent lag. 

Update Games

You also want to ensure you are using the latest version of the game. Developers will frequently release updates that can improve performance, fix bugs, and address security issues. Therefore, you should keep an eye out for any updates and complete these ASAP to enhance your gaming experience. 

Nothing is more frustrating than lag, especially when it happens at a key moment in the game! The above are the most effective ways to reduce lag, and combining these methods together should create a smooth, enjoyable gaming experience. Hopefully, this will also help you to improve your performance and avoid mistakes that result from the game freezing.

Distinguishing Myths from Facts: Understanding Lab Grown Diamond Rings

0

In the world of fine jewelry, lab-grown diamond engagement rings have been gaining significant attention and popularity in recent years. These exquisite gems are often touted as ethical, eco-friendly, and cost-effective alternatives to traditional mined diamonds. However, as with any emerging trend, there are several misconceptions and myths surrounding lab-grown diamonds that can obscure their true value and significance. 

In this article, we will delve into the world of lab-grown diamond engagement rings, exploring the science behind them, debunking common myths, and shedding light on why they have become a compelling choice for modern couples.

The Science Behind Lab-Grown Diamonds

Before delving into the myths and facts surrounding lab grown diamond engagement rings, it is essential to understand the science that underpins their creation. Lab-grown diamonds, also known as synthetic or cultured diamonds, are produced through a process known as chemical vapor deposition (CVD) or high-pressure, high-temperature (HPHT) methods. These processes replicate the conditions deep within the Earth’s mantle where natural diamonds are formed.

Myths And Facts About Lab Grown Diamonds

1. Myth: Lab-Grown Diamonds Are Not Real Diamonds

One of the most common myths about lab-grown diamond engagement rings is that they are not “real” diamonds. In fact, lab-grown diamonds share the same chemical composition and crystal structure as mined diamonds, making them indistinguishable from natural diamonds to the naked eye. Both natural and lab-grown diamonds are composed of carbon atoms arranged in a cubic crystal lattice, which gives them their exceptional brilliance and durability.

2. Fact: Lab-Grown Diamonds Are Ethical and Conflict-Free

One of the most compelling reasons to choose a lab grown diamond engagement ring is its ethical and conflict-free nature. Unlike mined diamonds, which have been associated with human rights abuses and environmental damage in some regions, lab-grown diamonds are produced in controlled laboratory settings. This means that there is no risk of purchasing a diamond that has contributed to unethical practices or armed conflicts.

3. Myth: Lab-Grown Diamonds Are Cheap and Inferior in Quality

It is a common misconception that lab-grown diamond engagement rings are cheap and of lower quality compared to their mined counterparts. While it is true that lab-grown diamonds are often more affordable than natural diamonds, this does not necessarily mean they are of inferior quality. In fact, lab-grown diamonds can exhibit the same exceptional clarity, color, and brilliance as mined diamonds. The lower price is often attributed to the reduced costs associated with the production process and the absence of mining expenses.

4. Fact: Lab-Grown Diamonds Are Eco-Friendly

Another significant advantage of lab-grown diamond engagement rings is their eco-friendliness. Traditional diamond mining can have a detrimental impact on the environment, including deforestation, soil erosion, and habitat destruction. In contrast, lab-grown diamonds require significantly fewer resources and produce fewer carbon emissions. Additionally, some lab-grown diamond producers are committed to using renewable energy sources in their manufacturing process, further reducing their environmental footprint.

5. Myth: Lab-Grown Diamonds Lack Rarity and Sentimental Value

Some people believe that lab-grown diamonds lack the rarity and sentimental value associated with natural diamonds. While it is true that natural diamonds are formed over millions of years and are relatively scarce, the emotional significance of a diamond is a personal matter. Lab-grown diamond engagement rings can hold just as much sentimental value as mined diamonds, as they symbolize love, commitment, and the journey of a relationship.

Choosing Lab-Grown Diamond Engagement Rings

Now that we have clarified some of the myths and facts about lab-grown diamond engagement rings, let’s explore why they have become a compelling choice for modern couples.

1. Affordability and Value

Lab-grown diamonds offer exceptional value for money. They are typically priced lower than natural diamonds of similar quality, allowing couples to allocate their budget to other aspects of their wedding or future together. The affordability of lab-grown diamonds makes high-quality, larger carat stones accessible to a wider range of individuals, enabling them to create the ring of their dreams without breaking the bank.

2. Customization

Lab-grown diamond engagement rings are often designed with a high degree of customization in mind. Couples can choose from a variety of shapes, sizes, and settings to create a unique piece that reflects their personal style and story. Whether it’s a classic round brilliant-cut diamond or a fancy colored diamond, lab-grown diamonds offer a wide range of options for customization.

3. Ethical and Environmental Considerations

Many couples today are conscious of the impact their choices have on the world. By selecting lab-grown diamond engagement rings, they can take a stand against unethical mining practices and contribute to a more sustainable future. This ethical and environmental consciousness aligns with the values of many modern couples who want their love to be a force for positive change.

4. Exceptional Quality

Lab-grown diamonds are not only cost-effective but also offer excellent quality. They are virtually identical to natural diamonds in terms of appearance and durability. This means that couples can enjoy the beauty and brilliance of a genuine diamond without compromising on quality or authenticity.

5. Future Innovations

As technology advances, the quality and availability of lab-grown diamonds continue to improve. Manufacturers are constantly refining their processes to produce even more exquisite diamonds, providing couples with increasingly appealing options for their engagement rings. This constant innovation ensures that lab-grown diamonds will remain a compelling choice for years to come.

Conclusion

Lab-grown diamond engagement rings are a modern and ethical alternative to traditional mined diamonds. By debunking common myths and highlighting the facts about these exquisite gems, it becomes clear that they offer numerous benefits, including affordability, customizability, ethical and environmental considerations, and exceptional quality.

The choice between lab-grown and natural diamonds ultimately comes down to personal preferences and values. For many couples, lab-grown diamonds provide an opportunity to celebrate their love in a way that aligns with their ethical and environmental beliefs while enjoying a stunning, high-quality diamond that symbolizes their commitment.

In the world of lab-grown diamond engagement rings, the myths are overshadowed by the facts, making these gems an attractive and meaningful choice for couples embarking on the journey of a lifetime together. As the jewelry industry continues to evolve, lab-grown diamonds are likely to play an increasingly prominent role, offering couples a beautiful and responsible option to mark their love and commitment.

iPhone 15 vs iPhone 14 vs iPhone 13 Battery Life Drain Test: Detailed Comparison

0

In this comprehensive article, we will conduct a thorough battery drain test to compare the battery performance of the iPhone 15, iPhone 14, and iPhone 13. All three devices are brand new and have their display brightness set evenly.

To ensure fair testing conditions, all iPhones are connected to the same Wi-Fi and cellular networks running the latest iOS version 17. It’s important to note that the results presented here may not reflect individual usage patterns, as variables like standby time, cell signal strength, temperature, and personal device usage can impact battery performance differently for each user.

iPhone 15 vs iPhone 14 vs iPhone 13 Battery Life Drain Test

Web Browsing Test

For the first test, we will browse the web using Safari on all three devices for one hour. After this hour, we observed that the iPhone 15 demonstrated a slight lead in battery efficiency compared to the other models. However, it’s essential to interpret battery test results with caution, as uncontrollable variables can always influence the outcome.

The iPhone 15 houses a 3349 milliamp-hour battery, a slight upgrade from the 3279 milliamp-hour battery found in the iPhone 14. Surprisingly, the iPhone 13 performed marginally better than the iPhone 14 in this test, although such variations should be treated with scepticism due to the inherent unpredictability of testing conditions.

iPhone 15 vs iPhone 14 vs iPhone 13 Battery Life Drain Test

Gaming Test

Moving on to the gaming test, we played Minecraft on all three devices, ensuring that graphics settings were consistent to maintain fairness. The devices experienced similar battery drain percentages, with variations ranging between one and three percentage points. It is worth noting that all three devices performed admirably during this gaming session.

Video Streaming Test

Next, we return to YouTube for an hour of video streaming, then check the battery levels after this second hour of media consumption. Surprisingly, both the iPhone 13 and iPhone 15 exhibited a seven percent battery loss, while the iPhone 14 experienced a slightly higher drain of nine percent. These results imply that the iPhone 13 and iPhone 15 perform similarly in terms of energy efficiency during video streaming, with the iPhone 14 trailing slightly behind.

Overall Performance and Recommendation

The iPhone 15 can be considered an incremental upgrade over its predecessors. It introduces features such as the dynamic Island on the standard, USB-C compatibility, and a slightly modified design, giving the device a more premium feel. However, if you currently own an iPhone 13, upgrading to the iPhone 15 may not be necessary or recommended.

iPhone 15 vs iPhone 14 vs iPhone 13 Battery Life Drain Test

As the test progressed, we conducted post-web browsing and Instagram scrolling check-ins. Remarkably, after 9 hours and 52 minutes, the iPhone 14 ran out of battery. It is important to note that this result should not be considered significant, as battery performance can vary in individual devices due to pre-existing conditions or other factors. IPhone 13 and iPhone 15 experienced similar battery drain percentages during the extended test, but the iPhone 13 outlasted the iPhone 15 before finally running out of battery.

iPhone 15 vs iPhone 14 vs iPhone 13 Battery Life Drain Test

All three of Apple’s latest standard iPhones showcased fantastic battery life throughout this battery drain test. The iPhone 15 demonstrated slightly improved battery efficiency compared to its predecessors. Nevertheless, it is crucial to remember that these tests cannot account for all real-world variables that can impact battery performance. Personal usage patterns, network conditions, and numerous other factors may influence your iPhone’s battery life differently.

You Can Check iPhone 15 vs iPhone 14 vs iPhone 13 Battery Life Drain Test

Intel K vs KF: A Comparison of Performance and Price

When building a high-performance computer, choosing a suitable processor is crucial. Intel has been a leader in the CPU market for years and offers builders a wide range of options. The Intel K and KF processors are popular options known for their overclocking capabilities.

FeatureIntel K ProcessorsIntel KF Processors
Integrated GraphicsYesNo
Processor Graphics ModelIntel UHD Graphics 630N/A
Recommended UseBest for gaming and general useBest for gaming and general use
OverclockingYesYes
PriceUsually priced higher than KF versionUsually priced lower than K version
AvailabilityWidely availableLess widely available

But what sets them apart?

The main difference is that the KF models lack integrated graphics, while the K models include them. If you plan on using a dedicated graphics card, opting for the KF model may be a better choice as it can save you money without sacrificing performance. However, if you want a backup option or don’t plan on using a dedicated graphics card, the K model may suit your needs.

In this article, we’ll dive deeper into the differences between these two processors and help you decide which one is best for your build.

Intel K Vs Kf Vs F Cpus: Know the Difference

Intel K Vs Kf Vs F Cpus: Know The Difference

FeatureIntel K ProcessorsIntel KF ProcessorsIntel F Processors
Integrated GraphicsYesNoNo
Processor Graphics ModelIntel UHD Graphics 630N/AN/A
Recommended UseBest for gaming and general useBest for gaming and general useBest for professional use
OverclockingYesYesNo
PriceUsually priced higher than KF versionUsually priced lower than K versionUsually priced lower than K version
AvailabilityWidely availableLess widely availableLess widely available
TDP (Thermal Design Power)Generally higher TDPGenerally higher TDPGenerally lower TDP
PerformanceHigh performanceHigh performanceHigh performance
Multi-threadingEnabledEnabledEnabled

As you research computer components, you may have encountered Intel processors with various suffixes. K, KF, and F. What do these letters signify? And how do they impact your computing experience?

First off, let’s take a closer look at the K and KF suffixes. These indicate that the CPU is unlocked, so you can overclock it, pushing it beyond its standard frequency limits to achieve higher performance. The only difference is that the KF variant lacks integrated graphics.

On the other hand, F CPUs do not have integrated graphics either but are not unlocked for overclocking. So why would someone choose an F CPU over a K or KF variant? If you plan to use a dedicated GPU anyway and don’t care about overclocking your processor, an F CPU could save you money without sacrificing performance.

What Are the Meaning of the K, Kf, and F Suffixes?

SuffixMeaning
KUnlocked processor with overclocking capability, including integrated graphics.
KFAn unlocked processor with overclocking capability does not include integrated graphics.
FProcessor without integrated graphics

Now that we know the fundamental differences between Intel K, KF, and F CPUs, let’s dive deeper into the meaning of their suffixes.

The ‘K’ in Intel K CPUs stands for ‘unlocked multiplier’, meaning users can overclock these processors beyond their default clock speeds. This is a popular choice for enthusiasts who want to get the most out of their gaming or content creation experience.

On the other hand, the ‘KF’ suffix in Intel CPUs stands for ‘no integrated graphics’. This means these CPUs do not have a built-in GPU and require a dedicated graphics card to function correctly. This is ideal for users building a gaming PC or workstation with a separate graphics card.

Lastly, Intel CPUs’ ‘F’ suffix is ‘graphics-free’. These processors are similar to KF CPUs in that they don’t have an integrated GPU but are often used in budget builds where a dedicated graphics card is not needed or desired.

So, which Intel CPU is the cheapest?

Generally speaking, F CPUs tend to be less expensive than their K and KF counterparts due to their lack of integrated graphics. However, it’s essential to consider your specific needs and budget before deciding on which CPU to purchase.

Which Intel Cpu is the Cheapest?

Which Intel Cpu is the Cheapest?


CPU TypePrice RangeRecommended Use
Intel Celeron100Basic computing tasks such as web browsing, word processing, and light multimedia consumption
Intel Pentium200Everyday computing tasks, including light productivity and multimedia consumption
Intel Core i3250Home and office use, including multitasking, internet browsing, and light content creation
Intel Core i5350Mid-range computing tasks, including gaming, video editing, and multitasking
Intel Core i7500High-performance computing tasks, including heavy multitasking, 3D modeling, and video editing
Intel Core i9$500 or moreExtreme performance computing tasks, including gaming, video editing, and AI/ML development

The Intel Core i3, Pentium, and Celeron CPUs are three of the most affordable Intel processors.

The Core i3 offers excellent performance for everyday applications, while the Pentium and Celeron CPUs are great for basic computing tasks.

The Pentium and Celeron CPUs are cheaper than the Core i3 but don’t perform similarly.

The Intel Core i3 is available in both the ‘K’ and ‘KF’ versions, but the ‘KF’ version is usually cheaper.

The ‘K’ version is unlocked, so it can be overclocked for better performance, while the ‘KF’ version is locked and can’t be overclocked.

So, if you’re looking for the best bang for your buck, the ‘KF’ Intel Core i3 is probably the cheapest Intel CPU for most people.

Intel Core i3

Intel Core i3We are looking for an Intel CPU that won’t break the bank. The Core i3 series might just be what you need.

This processor’s K and KF versions are affordable options, but there are some key differences to consider.

Firstly, let’s talk about what these CPUs have in common. They both have two cores and support hyper-threading, which means they can handle up to four threads simultaneously. They also both have a TDP (thermal design power) of 65 watts, meaning they won’t require much cooling.

So, what sets them apart?

The main difference is that the KF version lacks integrated graphics, whereas the K version does.

If you use a dedicated graphics card anyway, you won’t need the integrated graphics and might be better off going for the KF version.

On the other hand, if you don’t plan on using a dedicated graphics card or want the flexibility to switch between integrated and dedicated graphics as needed, go for the K version.

Intel Pentium

Now that we’ve discussed the Core i3 series, let’s look at another affordable option: the Intel Pentium.

This CPU is known for its budget-friendly price point, making it a popular choice for those looking to build a computer on a tight budget.

One thing to remember is that the Pentium doesn’t have as many cores or threads as some of the higher-end CPUs. Most models have just two hearts and lack hyper-threading support, meaning they can only handle two lines simultaneously.

However, this doesn’t mean they are unusable; they can still easily handle basic tasks such as web browsing and word processing.

Another factor to consider is that the Pentium often comes with integrated graphics, saving you money if you don’t use a dedicated graphics card.

However, if you plan on gaming or heavy-duty video editing, you’ll likely want to invest in a separate GPU for better performance.

The Intel Pentium is worth considering if you’re looking for an inexpensive CPU that can handle everyday tasks without breaking the bank.

Intel Celeron

Now that we’ve discussed the Intel Pentium, let’s look at its even more budget-friendly cousin: the Intel Celeron.

This CPU is known for being the cheapest option in the Intel family and is often found in entry-level laptops and desktops.

Like the Pentium, the Celeron typically has just two cores and lacks hyper-threading support. However, it also has a lower clock speed and cache size, making it even less potent than its slightly more expensive counterpart.

The Celeron can still handle basic web browsing and word-processing tasks. However, it may struggle with more demanding applications or multitasking.

Ultimately, the Intel Celeron may be worth considering if you’re looking for the most affordable CPU option and don’t plan on using your computer for anything too intensive.

Remember that you may need to upgrade in the future if you decide to take on more demanding tasks.

The Intel Core-kf Processor

The Intel Core-Kf Processor

I’m interested in comparing the performance of the Intel Core-KF processor to other processors.

Has anyone had experience overclocking it?

I’m curious to know what kind of results they got.

I’d also be interested to hear about any potential drawbacks of overclocking the Intel Core-KF processor.

Does anyone have any insights they’d be willing to share?

Performance

If you’re looking for a powerful processor that can handle everything from gaming to content creation, then the Intel Core-KF processor is worth considering.

One key factor that sets this processor apart is its impressive performance capabilities. With a base clock speed of 3.7 GHz and the ability to boost up to 5.1 GHz, it can deliver lightning-fast speeds that can keep up with even the most demanding applications.

Regarding raw performance, the Intel Core-KF processor is one of today’s most potent options. It features eight cores and sixteen threads, so it can easily handle even the most complex workloads.

Whether rendering high-resolution video or running multiple virtual machines simultaneously, this processor has what it takes to do the job quickly and efficiently.

Another factor that contributes to the impressive performance of the Intel Core-KF processor is its lack of integrated graphics. While some users might see this as a drawback, it allows for more efficient processing power because all resources are focused solely on computing tasks rather than graphics.

This makes it an ideal choice for anyone who needs maximum processing power without sacrificing speed or efficiency.

Overclocking

So we’ve established that the Intel Core-KF processor is a powerhouse in terms of performance. But what if you want even more speed and power? That’s where overclocking comes in.

Overclocking essentially means pushing your processor beyond its factory settings to achieve higher clock speeds and better performance. The Intel Core-KF processor is designed with overclocking in mind, making it a popular choice for enthusiasts and gamers who want to get the most out of their hardware.

With some tweaking and adjustments, pushing the Intel Core-KF processor well beyond its base clock speed of 3.7 GHz is possible. Some users have reported achieving clock speeds as high as 5.3 GHz, translating into even faster processing times and improved performance across the board.

Of course, it’s worth noting that overclocking does come with some risks. Pushing your hardware too far can lead to instability, crashes, and permanent damage. However, if you know what you’re doing and take proper precautions, overclocking can be a great way to unlock even more power from your Intel Core-KF processor.

Intel K Vs Non-k Processors

Intel K Vs Non-K Processors

FeatureIntel K ProcessorsNon-K Processors
OverclockingCan be overclockedIt cannot be overclocked
Integrated GraphicsVaries by model, usually includedVaries by model, usually included
Processor Graphics ModelVaries by model, usually Intel UHD Graphics or Intel HD GraphicsVaries by model, usually Intel UHD Graphics or Intel HD Graphics
Recommended UseBest for gaming and general useBest for public service but may not be optimal for gaming
PriceUsually priced higher than the non-K versionUsually priced lower than K version
AvailabilityWidely availableWidely available
TDP (Thermal Design Power)Generally higher TDPGenerally lower TDP
PerformanceGenerally higher performance due to overclocking capabilityGenerally lower performance due to lack of overclocking capability
Multi-threadingEnabledEnabled or disabled, depending on model

Intel K and Non-K processors are two types of processors that Intel offers. The main difference between these two types is that the K processors are unlocked, meaning they can be overclocked to achieve higher clock speeds than their non-K counterparts. Overclocking involves increasing the clock speed of a processor beyond its factory-set limits, which can lead to better performance but also increases heat output.

However, overclocking is not for everyone. It requires some technical knowledge and may void your warranty if done improperly. If you don’t plan on pushing your processor to its limits, then a non-K processor might be a better option.

Non-K processors are still powerful and reliable for everyday use, such as web browsing and office work. Ultimately, deciding between an Intel K or Non-K processor depends on your specific needs and budget. If you want the ability to overclock and are willing to pay extra for it, then go with an Intel K processor.

But if you don’t plan on overclocking and want to save money, then a non-K processor will work fine for most tasks.

Intel K Vs Kf: Which Should You Buy?

Intel K Vs Kf Which Should You BuyYou may wonder which processor to choose between the Intel K and KF. Consider a hypothetical scenario where you build a gaming PC and want the best performance for your money. You’ve narrowed your options to these two processors, so which one should you go for?

Firstly, it’s important to note that both processors are very similar in terms of specifications. The only difference is that the KF version doesn’t have an integrated GPU, whereas the K version does. If you plan on using a dedicated graphics card (which most gamers do), you won’t need the integrated GPU anyway.

So, which one should you buy? Here are some factors to consider:

– Price: The KF version is usually slightly cheaper than the K version, so this may be better if budget concerns you.

– Overclocking: Both processors are unlocked and can be overclocked, but the K version has better-overclocking potential due to its integrated GPU. If you plan to push your processor to its limits with overclocking, then the K version may be worth considering.

– Power consumption: Without an integrated GPU, the KF version consumes slightly less power than the K version.

– Availability: One version may be more readily available depending on where you live or buy from.

Ultimately, whether you choose the Intel K or KF will depend on your specific needs and preferences. Consider factors such as price, overclocking potential, power consumption and availability before deciding.

Frequently Asked Questions

1. How Do the K, Kf, and F Suffixes Affect the Performance of Intel Cpus?

When it comes to Intel CPUs, the k, kf, and f suffixes can have a significant impact on performance.

The k suffix denotes an unlocked multiplier, allowing for easier CPU overclocking. Users can push their CPU beyond its stock clock speeds for increased performance.

The kf suffix is similar to the k suffix but lacks integrated graphics. This can be useful for users who use a dedicated graphics card instead of relying on the integrated graphics.

Finally, the f suffix denotes a CPU without integrated graphics altogether. While this may not affect overall performance, it can be helpful for users who do not require or want integrated graphics and would instead save money by purchasing a CPU without them.

2. Can I Overclock a Kf Processor?

Overclocking a KF processor is possible and can be quite exhilarating! With its unlocked multiplier, the KF CPU can be pushed to its limits to achieve maximum performance.

However, it is essential to note that overclocking should only be done by experienced users and with proper cooling solutions to avoid damaging your system.

So if you’re up for the challenge, grab a KF processor and let the overclocking adventure begin!

3. Are There Any Compatibility Issues With Kf Processors Compared to K Processors?

Are there any compatibility issues with KF processors compared to K processors?

The main difference between these two types of CPUs is that KF processors lack integrated graphics, making them slightly cheaper than their K counterparts. However, this also means you’ll need a dedicated graphics card to use a KF processor.

Other than that, there shouldn’t be any significant compatibility issues. Both CPUs are designed to work with Intel’s LGA 1151 socket and support similar features, such as overclocking (if your motherboard allows it).

So if you’re building a gaming PC or workstation and don’t mind getting a separate GPU, a KF processor could be a great option.

4. What Are the Advantages of Buying a K Processor Over a Non-k Processor?

When buying a processor, there are some advantages to opting for a ‘k’ version over a non-k version.

The most notable advantage is the ability to overclock, which allows for higher clock speeds and improved performance.

Additionally, k processors often have more cache and higher base clock speeds than their non-k counterparts.

However, it’s important to note that not all motherboards support overclocking, and a k processor’s cost can be significantly higher than a non-k version.

Ultimately, it depends on your specific needs and budget when deciding whether the advantages of a k processor outweigh the added cost.

5. Is There a Significant Price Difference Between K and Kf Processors, and is It Worth Paying for the K Version?

Looking for the perfect processor for your computer can be a real headache. You want something fast, reliable, and efficient, but what’s the difference between a k and kf processor?

The truth is, there is a price difference between these two processors, with the k version being slightly more expensive. However, whether it’s worth paying for depends on your specific needs.

Suppose you plan to overclock your system or need maximum performance for demanding gaming or video editing applications. In that case, it might be worth shelling out extra cash for the k version. On the other hand, if you don’t plan to overclock and need a solid processor that gets the job done, then the kf version may be more cost-effective.

As they say, ‘different strokes for different folks.’

Conclusion

In conclusion, the K, KF, and F suffixes significantly impact the performance of Intel CPUs.

The K suffix denotes an unlocked multiplier, allowing users to overclock their processors.

The KF suffix is similar to the K suffix but lacks integrated graphics.

Meanwhile, the F suffix indicates that the processor lacks integrated graphics and cannot be overclocked.

According to market analysis company PCPartPicker, the average price difference between a K and KF processor is around $10.

However, this slight price difference can significantly affect compatibility and performance capabilities for power users who plan to overclock their CPUs or use a dedicated graphics card.

Ultimately, it comes down to personal preference and intended usage when deciding whether to opt for a K or KF processor.

Gpu Hierarchy | Graphics Card Tiered Performance List

GPU hierarchy is pivotal in understanding the performance, price, and appeal of different Graphics Processing Units. This concept places GPUs in a tiered system based on performance, cost, generation, and usage parameters. This categorization helps consumers and professionals determine the most suitable selection for their specific needs.

Notable brands like Nvidia, AMD, and Intel each produce their lines of GPUs. There’s a wide range of options, from Nvidia’s GeForce RTX series and AMD’s Radeon RX line to Intel’s up-and-coming Arc Alchemist offering. These GPUs come in multiple tiers, some designed for high-end gaming or professional use and others more budget-friendly.

Within each brand, various series cater to different market segments. Nvidia’s Quadro and Titan, AMD’s Radeon Pro and Instinct, and some expected professional-level offerings from Intel are designed for data center and workstation applications. Contrarily, gaming GPUs are typically segmented as flagship (high-end), mid-range, and budget tiers.

The components under the hood of these GPUs determine their performance level. Core count, clock speed, memory speed, and memory bandwidth are crucial for gaming or 3D rendering tasks. However, the introduction of ray tracing and Tensor cores in recent generations of GPUs has reshaped the landscape, bringing more depth and realism to visual rendering.

Another essential factor is the compatibility with graphics programming interfaces like Vulkan, DirectX, and OpenGL. These APIs are critical in how well a GPU can handle gaming, animation, and video editing tasks.

In machine learning and artificial intelligence, GPUs allow for speedy processing of complex computations. These tasks often require robust performance, for which the GPU’s manufacturing process node and thermal design power (TDP) are critical.

Moreover, it’s essential to factor in the system’s other components when considering a GPU. Whether CPU, RAM, PSU, motherboard, or even the form factor of your case, any of these could potentially result in a bottleneck, limiting the performance of the GPU.

Traditionally, GPU hierarchy was determined by running various benchmarks, looking at frame rates at different resolutions and detail settings. However, other aspects, like power consumption (performance per watt), and value for money, are becoming increasingly significant for consumers.

Whether buying a gaming laptop, gaming desktop or building a workstation for professional graphics, understanding the GPU hierarchy can guide you to make the most efficient decision in keeping with your performance needs and budget. Although a daunting task, a clear comprehension of this tiered structure simplifies the process, allowing for a more nuanced approach to selecting GPUs.

What is a GPU?

GPU stands for graphics processing units, which plays a key responsibility in video rendering, content creation, machine learning, etc. They accelerate the graphics on the system and create stunning visuals on the screen.

Ray Tracing Gpu Benchmarks Ranking 2023

GPUs are not only restricted to content creation but are also responsible for accelerating workloads, deep learning, and many more.

Many people often confuse between the GPU and graphics card. Just like a motherboard with a CPU, a graphics card also has an add-in board to accelerate graphics with the help of a GPU.

Types of GPU

Two types of GPU are available in the market: Integrated CPU and Discrete graphics processing units. Both these types of GPU are designed to serve different purposes.

Integrated Graphics Processing Unit

The majority of the GPUs you find in the market are integrated once. This GPU is integrated into the motherboard of the CPU and is only useful for systems with reduced power consumption and budget.

You can find the basic Intel GPUs installed in the entry-level systems, which can run the basic graphic requirements and deliver long battery life for the systems.

Discrete Graphics Processing Unit

An integrated graphics unit is usually sufficient to run the basic requirements. However, suppose you are looking for a GPU that can handle graphic-intensive tasks and also needs to run resource-intensive applications. In that case, going for a discrete graphics processing unit is recommended.

These GPUs will create a lot of heat and consume more power while in operation. Hence, they require a dedicated cooling system for proper GPU thermal management.

Do We Need a GPU Hierarchy?

Yes, we need a GPU Hierarchy to understand which GPU is better designed for what kind of tasks. For example, if you are a heavy gamer, GPUs with excellent parallel computing are preferred. On the other hand, if you are looking for a GPU to handle low-level tasks, then you can pick any D Tier GPU.

What factors affect GPU hierarchy?

Navigating the GPU hierarchy can be crucial for both professionals and consumers to make informed decisions. We’re going to explore the determining factors that shape this hierarchy.

Generation and Core Functionality

The generation of the GPU plays a significant role in the hierarchy. As technology evolves, newer generations bring in more potent processing capabilities, pioneering features, and better efficiencies. For instance, Nvidia’s recent invention of RT and Tensor Cores have enriched tasks like ray tracing and machine learning functionalities.

Processing Power and Speed

A GPU’s position in the hierarchy also depends on its core count as more cores generally mean beefier processing for intensely parallel tasks like deep learning and 3D rendering. AMD’s Radeon RX series are often exemplars in this aspect. Furthermore, the clock speed is critical too. Being the measure of frequency, it signifies the rate at which a GPU core can process instructions, thus affecting all types of tasks.

Memory Utility and Process Node

The memory speed and bandwidth significantly influence how quickly a GPU accesses or transfers data, impacting its overall efficiency. Notably, the process node technology contributes immensely to the GPU hierarchy. A smaller process node implies that more transistors fit onto the GPU chip, resulting in elevated performance and efficiency.

Power Consumption, Cooling, and Form Factor

The consideration of power consumption and related thermal solutions also affect the GPU hierarchy. High Thermal Design Power (TDP) GPUs often mandate robust cooling solutions, hence impacting the GPU’s performance and its resulting position in the hierarchy. Equally, the size or form factor of the GPU can be important, especially when considering compatibility with diverse systems or cases.

Brand and Compatibility

Choice of the brand can influence the positioning within the GPU hierarchy. A choice between Nvidia, AMD, and Intel can depend on several factors, including performance in specific applications, such as gaming or professional graphics, and compatibility with programming interfaces (APIs) such as Vulkan, DirectX, and OpenGL.

System Bottlenecks

Lastly, potential bottlenecks across the rest of the system must not be ignored. A high-performance GPU might not yield its fullest capabilities if paired with an inadequate CPU, RAM, or PSU.

Conclusive Thoughts

Determining the GPU hierarchy is a complex process that involves significant aspects discussed above. Acknowledging these facts is critical when selecting a GPU that aligns perfectly with individual needs, system configurations, and budget.

Cards Based on their Tiers

  • S Tier

These are one of the best tier GPUs available in the market right now. For anyone who is a gaming enthusiast and loves to play 4K resolution games, S-Tier GPUs are the best choice. Most of these cards have 12 GB VRAM, which is good enough for running AAA title games that are graphic intensive.

Among the S-Tier GPUs, GeForce RTX 4090 is the top-ranked one, followed by GeForce RTX 4080, and the least ranked among the S-Tier GPUs is Radeon RX 6800 XT manufactured by AMD.

ModelManufacturer
1.RX 6950 XTAMD
2.RTX 3090 TiNVIDIA
3.RTX 3090NVIDIA
4.RX 6900 XTAMD
5.RTX 3080 TiNVIDIA
6.RTX 3080NVIDIA
7.RX 6800 XTAMD
8.Titan RTXNVIDIA
  • A Tier

These cards are powerful GPUs but come next to the S-Tier GPUs. These GPUs are popular among the streamers and gamers. You can play 2K resolution games without any lag in the performance. Also, you can try gaming 4K resolution games at 60 FPS.

Each of these GPUs has 8 GB of VRAM, and the 30-series of NVIDIA has a GDDR6X for the best performance.

GeForce RTX 3070 Ti GPU is considered stable and best among the A-Tier, while GeForce RTX 2080 is least among this list. However, the GeForce RTX 2080 GPU still has the power and capability to perform many graphic-intensive tasks and is way ahead of Titan XP GPUs even now.

ModelManufacturer
1.RX 6800AMD
2.RTX 3070 TiNVIDIA
3.RX 6750 XTAMD
4.RTX 3070NVIDIA
5.RTX 2080 TiNVIDIA
6.RX 6700 XTAMD
7.RTX 3060 TiNVIDIA
8.RTX 2080 SuperNVIDIA
9.RTX 2080NVIDIA
10.Titan XPNVIDIA
11.Titan XNVIDIA
12.RTX 2070 SuperNVIDIA
13.GTX 1080 TiNVIDIA
14.Radeon VIIAMD
15RX 6650 XTAMD
16.RX 5700 XTAMD
17.RX 6600 XTAMD
18.RTX 3060NVIDIA
19.RX 5700AMD
20.RTX 2070NVIDIA
  • B Tier

These GPUs make the best mid-tier graphics card and are more budget-friendly. Some GPUs in this tier support ray tracing technology just like the above two tiers. This tier consists mostly of AMD cards rather than NVIDIA cards. Once upon a time, the B Tier GPUs were considered to be on the top-of-line cards, but now, with advancements in the GPU hierarchy, these are considered a mid-level tier.

NVIDIA’s RTX 2060 Super is considered to be one of the best in this tier, while GTX 1070 Ti is considered to be the least performer among the GPUs in this tier.

ModelManufacturer
1.RTX 2060 SuperNVIDIA
2.RX 6600AMD
3.RX Vega 64AMD
4.RX 5600 XTAMD
5.RTX 2060NVIDIA
6.GTX 1080NVIDIA
7.RX Vega 56AMD
8.GTX 1070 TiNVIDIA
  • C Tier

If you are looking for an entry-level GPU that can suffice the needs of 60 FPS and 1080p resolutions, then C-Tier GPUs are good to go. In short, you can play low graphic-intensive games on this GPU. These GPUs are best suited for day-to-day use. NVIDIA chipsets have a strong edge in this section compared to the AMD processors.

GTX 1660 Ti ranks top among the C-Tier GPUs, while GTX 1060 is the least performer in this tier.

ModelManufacturer
1.GTX 1660 TiNVIDIA
2.GTX 1660 SuperNVIDIA
3.GTX 1070NVIDIA
4.GTX 1660NVIDIA
5.RX 5500 XT 8GBAND
6.GTX 1650 SuperNVIDIA
7.RX 5500 XT 4GBAMD
8.GTX 1060 6GBNVIDIA
  • D Tier

These are completely low-tier or entry-level GPUs that are suitable only for low-demanding jobs and day-to-day tasks. Some of the good D-Tier GPUs are Intel Arc A380, GTX 1650, and Radeon RX 6400.

ModelManufacturer
1.GTX 1650NVIDIA
2.GTX 1060 3GBNVIDIA
3.GTX 1050 TiNVIDIA
4.GTX 1050NVIDIA

Mobile GPU Hierarchy

Notebooks, laptops and mobile devices utilize more power efficient integrated or discrete GPUs tailored to portable form factors. Here are the rankings for mobile GPUs from top tier down to entry level.

Enthusiast Mobile GPUs

Top of the line mobile GPUs able to smoothly run games at 1440p or 1600p resolution on high settings.

GPUArchitectureCoresBoost ClockMemoryTDP
Nvidia RTX 3080 Ti LaptopAmpere74241390 MHz16 GB GDDR6175W
AMD Radeon RX 6800MRDNA 232002300 MHz12 GB GDDR6145W
Nvidia RTX 3080 LaptopAmpere61441590 MHz8 GB GDDR6165W
AMD Radeon RX 6700MRDNA 223042300 MHz10 GB GDDR6135W

These high-power flagship mobile GPUs enable desktop caliber gaming, but sacrifice portability with their cooling demands and lower battery life.

High-End Mobile GPUs

Balancing performance with greater efficiency for 1440p mobile gaming.

GPUArchitectureCoresBoost ClockMemoryTDP
Nvidia RTX 3070 Ti LaptopAmpere56321390 MHz8 GB GDDR6125W
AMD Radeon RX 6600MRDNA 217922177 MHz8 GB GDDR6100W
Nvidia RTX 3070 LaptopAmpere51201390 MHz8 GB GDDR6115W
AMD Radeon RX 6600SRDNA 217922100 MHz8 GB GDDR6100W

High-end laptop GPUs hit the sweet spot of performance versus efficiency and cooling demands. 1440p gaming is achievable with competent thermal management.

Mid-Range Mobile GPUs

Balanced mobile graphics for 1080p gaming at medium to high settings.

GPUArchitectureCoresBoost ClockMemoryTDP
Nvidia RTX 3060 LaptopAmpere38401403 MHz6 GB GDDR6115W
AMD Radeon RX 6600MRDNA 217922177 MHz8 GB GDDR6100W
Nvidia RTX 3050 Ti LaptopAmpere25601467 MHz4 GB GDDR680W
AMD Radeon RX 6500MRDNA 210241837 MHz4 GB GDDR650W

Mid-range mobile GPUs deliver reliable 1080p gaming while maximizing battery life. Their performance and efficiency is appealing for mainstream gaming laptops.

Entry Level Mobile GPUs

Budget focused mobile graphics suitable for 1080p gaming at lower settings.

GPUArchitectureCoresBoost ClockMemoryTDP
Nvidia RTX 3050 LaptopAmpere20481467 MHz4 GB GDDR680W
AMD Radeon RX 6400MRDNA 27682200 MHz4 GB GDDR650W
Intel Arc A370MAlchemist81550 MHz4 GB GDDR635W
Nvidia MX550Turing10241403 MHz2 GB GDDR635W

Entry level mobile GPUs must maximize efficiency for thin, portable laptops. Their reduced horsepower targets playable 1080p gaming in popular esports and multiplayer titles.

FAQs

What is GPU hierarchy?

GPU hierarchy is a comparison done among the GPUs based on real-life gaming benchmarks and also other key factors like FPS, performance in different resolution settings etc. This comparison is done between the current and previous generations of GPUs.

How is GPU hierarchy determined?

The GPU hierarchy is determined based on various parameters like clock speed settings, storage of the chip, whether the GPU has high bit rate memory or low bitrate memory, etc.

What are the different tiers of GPUs?

The different tiers of GPUs are:

  • S Tier
  • A Tier
  • B Tier
  • C Tier
  • D Tier

S Tier is top among all the GPUs.

Which GPU is the best?

S Tier GPUs are the best for anyone who is looking for graphic-intensive and high-performance tasks to be done. If you are looking for a specific GPU for out-and-out performance, then Nvidia GeForce RTX 4090 is the best. It has low latency while gaming.

What is the difference between a high-end GPU and a low-end GPU?

The key difference between a high-end GPU and a low-end GPU is that high-end GPUs are capable of playing powerful games, 3D graphics rendering, video, have a high bandwidth etc., which requires graphic and power intensive work. On the other hand, low-end GPUs are only capable of performing daily tasks and low end gaming with basic resolution settings.

What GPU do I need for gaming?

The best GPU for gaming are RTX 4080 and RTX 4090 (if you are looking for NVIDIA) or RX 6900 XT and RX 6950 XT (if you prefer AMD Radeon GPU). These chipsets are capable of playing 4K resolution games.

What GPU do I need for video editing?

For Video editing and Content creation, Intel Arc graphics for desktop is the best choice. It includes built-in machine learning, ray-tracing hardware, and also gives scalable performance for laptops and desktops.

If you are a professional content creator, then it is recommended to check the  Intel® Arc™ Pro A-series graphics as it has the ability to support multiple large displays with ultrawide UHD, ultra high definition, and also high dynamic range.

What GPU do I need for machine learning?

For machine learning and artificial intelligence related work, you can try NVIDIA GeForce 3090, RTX 3080, and 3080 Ti GPUs, as they come with excellent GPU optimization. If you are looking for a GPU with good thermal management, then opt for the RTX A5000 pro series.

How do I choose the right GPU for my needs?

If you are not a heavy gamer and require GPU only for low level task, then you can choose a GPU with minimum 2GB capacity. On the other hand, if you are heavy gamer or need a GPU for video editing, rendering, or any other heavy graphic tasks, then you need a GPU with best parallel computing capacity. Hence, you need at least 4GB capacity GPU.

What is the future of GPU hierarchy?

The future of GPU hierarchy looks very promising. It is expected that the GPU industry is likely to register a CAGR of 33.5% during 2022-2030.

Conclusion

Choosing the right GPU can be a daunting task, especially when you are not sure how each of these GPUs works.

As the GPU industry constantly evolves, you can see an improved performance in the latest generations. Being up-to-date about the latest GPUs will also help you understand what to expect from the graphics card. So, we hope that the GPU hierarchy outlined in this article helps you make an informed purchase decision.

What is Hdr for Monitors and is It Worth It?

0

High Dynamic Range (HDR) is an increasingly popular feature when it comes to monitors and TVs. But what exactly is HDR and is it worth the extra cost?

In this article, we’ll take a look at what HDR can do and whether or not it’s worth investing in. HDR promises to provide viewers with greater depth, contrast, and color than regular monitors. It can produce deeper blacks, brighter whites, and more vibrant colors than non-HDR displays. 

So if you’re looking for an improved viewing experience, then HDR might be a good option for you. Read on to find out more about HDR and whether it’s worth it!

What Does Hdr Do?

What Does Hdr Do?

High Dynamic Range (HDR) is a type of technology that is used to improve the quality of images viewed on monitors. It works by increasing the amount of color, contrast, and brightness that the monitor can display. This gives viewers a more realistic viewing experience with deeper blacks, brighter whites, and more vibrant colors.

HDR also enhances details in dark areas of an image, making it easier for viewers to make out information in those areas. To take advantage of HDR technology, monitors must be compatible with an HDR format such as HDR10 or Dolby Vision. Both formats are designed to provide an enhanced viewing experience but they differ in terms of their capabilities.

For instance, Dolby Vision supports higher peak brightness levels than HDR10 which results in a brighter picture overall. Additionally, Dolby Vision offers improved color accuracy compared to HDR10 and can offer up to 12-bit color depth instead of the 10-bit color depth offered by HDR10. Whether or not it is worth investing in an HDR monitor depends on how you plan to use it and your expectations for image quality.

If you are looking for a monitor that will give you a more realistic viewing experience with improved contrast and detail then investing in an HDR monitor can be worth it. However, if you just want something basic then you may be better off sticking with a regular non-HDR monitor. With this in mind, let’s look at the different types of HDR formats available: HDR10 vs Dolby Vision.

Hdr Formats: Hdr10 Vs Dolby Vision

Hdr Formats Hdr10 Vs Dolby Vision

Making the move from the traditional SDR display to HDR can be a perplexing proposition. Picking out pixels and choosing between the various formats on offer can be confusing for those not in the know. Nevertheless, understanding HDR and its various formats is key to making an informed decision about whether it is worth the investment for your monitor setup. 

The two main HDR formats – HDR10 and Dolby Vision – both boast improved color accuracy across a greater range of brightnesses, allowing for increased vibrancy and detail that was previously not possible with SDR displays.

* **HDR10**:

* Uses static metadata that applies to an entire video or scene;

* Utilizes 10-bit color depth (1 billion colors);

* Supports 4K resolution at up to 60 frames per second;

* Supported by a wide range of devices, including gaming consoles, Blu-ray players, streaming sticks, and more.

* **Dolby Vision**:

* Uses dynamic metadata that adjusts to each frame or scene;

* Supports 12-bit color depth (68 billion colors);

* Up to 4K resolution at up to 120 frames per second;

* Generally requires dedicated hardware for decoding Dolby Vision content;

* Currently only supported by select TVs and streaming boxes.

Ultimately, the choice between HDR10 and Dolby Vision comes down to personal preference and available hardware support. Whether either format is worth it will depend on the user’s individual preferences regarding image quality, budget constraints, and existing equipment setup.

The next step then is looking into what display standards are required in order to take full advantage of these HDR formats.

Display Hdr Standards by Vesa

Display Hdr Standards By Vesa

High Dynamic Range (HDR) is an advanced display technology that can significantly improve the visual experience on a monitor. The Video Electronics Standards Association (VESA) has developed several DisplayHDR standards, which are designed to help manufacturers and consumers understand what they can expect from HDR-enabled displays.

The highest level of VESA’s standards is DisplayHDR 1000, which requires a peak brightness of 1,000 nits and wide color gamut capabilities. This makes it ideal for viewing content such as HDR games or movies in vibrant colors and high contrast with deep black levels.

DisplayHDR 400 is the next tier down from DisplayHDR 1000, and it requires a peak brightness of 400 nits and 8-bit color. Still, this doesn’t mean that DisplayHDR 400 can’t deliver great visuals; it just means that the performance won’t be as impressive as DisplayHDR 1000. Displays with these specifications are better suited for general use like web browsing or watching normal content.

Whether or not HDR is worth it really depends on what you plan to do with your monitor. If you want to watch HDR content or play games with enhanced visuals, then investing in a DisplayHDR 1000 monitor will definitely be worth it. However, if you only need a monitor for standard tasks like web browsing or streaming videos, then something like a DisplayHDR 400 might be more suitable and cost-effective.

Moving on to local dimming…

Local Dimming

Local Dimming


Local Dimming is a technology that allows for improved image quality and contrast on monitors.

It has several benefits, such as better contrast and deeper blacks, as well as improved energy efficiency.

The technology works by dimming the backlight of certain sections of the monitor, allowing for deeper blacks and more accurate color reproduction.

It’s definitely worth it for those who want the best image quality on their monitors. 

Local Dimming Benefits

Local dimming is a feature used in LCD and OLED television sets, as well as computer monitors, to improve the contrast ratio. It works by turning off certain sections of the backlight to darken parts of the image while keeping other sections bright. This helps to create a more natural-looking image with deeper blacks and brighter whites.

The main benefit of local dimming is that it can produce much higher contrast ratios than non-local dimmed displays, which can be quite noticeable when watching dark scenes.

There are two major types of local dimming: full array and edge-lit. Full array local dimming utilizes an array of LEDs directly behind the panel to control brightness in different areas; this type typically provides better overall picture quality but is more expensive than edge-lit models. Edge-lit models have LEDs placed around the edges of the display, providing less precise control over brightness levels but at a lower cost.

No matter what type you choose, though, the local dimming can provide a dramatic improvement in picture quality for both movies and video games; however, it’s important to note that some displays may not support local dimming or may only offer limited implementation due to hardware constraints. As such, it’s important to research any potential purchases thoroughly before making your final decision.

Local Dimming Technology

Local dimming technology is a great way to improve the contrast ratio of LCD and OLED television sets, as well as computer monitors.

It works by turning off certain sections of the backlight to darken parts of the image while keeping other sections bright. This allows for much deeper blacks and brighter whites than non-local dimmed displays can offer.

There are two main types: full array and edge-lit. Full array local dimming utilizes an array of LEDs directly behind the panel for improved picture quality, but it’s more expensive than edge-lit models.

Edge-lit models have LEDs around the edges of the display, providing less precise control over brightness levels but usually at a lower cost. So no matter what type you choose, the local dimming can greatly enhance your viewing experience at home without breaking the bank.

Hdr Gaming

Hdr Gaming

Having discussed local dimming, it is now time to investigate the truth of a theory about HDR for monitors, and whether it is worth it.

High Dynamic Range (HDR) is a technology that can create very bright whites and deep blacks on your monitor. This means that details in shadows are much clearer and brighter highlights appear more vibrant. It also brings with it wider color gamuts which can make images look more lifelike than with traditional SDR or Standard Dynamic Range displays.

With these improvements in picture quality, many gamers have begun to transition to HDR displays for gaming. HDR gaming has become increasingly popular, as HDR-capable monitors have become cheaper and more widely available.

For those wanting the highest level of image quality, an HDR display may be worth the investment. Some games also allow players to customize their settings to get the best experience out of their monitor’s capabilities. However, not all games support HDR yet, so if you’re looking for improved visuals from your games then you should check if they support this technology before purchasing an HDR display.

In addition to improved image quality, there are other features that gamers should consider when purchasing an HDR monitor such as FreeSync Premium Pro & G-Sync Ultimate. These technologies offer low latency and variable refresh rates that help reduce stuttering and ghosting in fast-paced games. They also enable smoother gameplay overall which makes them ideal for competitive gamers who need every advantage they can get. 

So while an HDR monitor may cost more upfront, its performance benefits could be well worth it in the long run.

Freesync Premium Pro & G-sync Ultimate

Freesync Premium Pro & G-Sync Ultimate

HDR, or High Dynamic Range, is a feature available on some monitors that allow for an increased range of contrast and color depth. It enables a broader range of colors to be displayed on the screen, allowing for more vibrant images and videos with greater detail in both dark and bright areas.

FeatureFreeSync Premium ProG-Sync Ultimate
Sync TechnologyUses Adaptive-Sync technology to sync the graphics card and monitorProprietary hardware-based technology provides precise frame timing
HDR SupportSupports HDR10 and HDR content playback with a minimum peak brightness level of 400 nits, local dimming, and wide color gamut (WCG)Supports HDR10, Dolby Vision, and HDR content playback with a minimum peak brightness level of 1000 nits and local dimming
Variable Refresh Rate (VRR)Offers a VRR range of at least 120Hz and supports Low Framerate Compensation (LFC)Offers a VRR range of at least 144Hz with no support for LFC
PerformanceOptimized for smoother gameplay with reduced screen tearing and stutteringOptimized for ultra-high-end gaming with minimal screen tearing and stuttering
Certification ProcessA less stringent certification process than G-Sync UltimateA more rigorous certification process than FreeSync Premium Pro

FreeSync Premium Pro and G-SYNC Ultimate are two of the most popular technologies used in conjunction with HDR, allowing for smooth visuals without tearing or lag.

The main benefit of using FreeSync Premium Pro is that it offers low latency at up to 120Hz refresh rate, providing a smoother gaming experience compared to conventional displays. Additionally, it can reduce ghosting effects on fast-paced games and has support for HDR content from both AMD and NVIDIA graphics cards. 

G-SYNC Ultimate is also an excellent option for gamers who want the best performance from their monitor. This technology provides up to 144Hz refresh rates with minimal input lag as well as support for HDR content from both NVIDIA and AMD graphics cards. Moreover, it supports a variable overdrive setting which helps reduce motion blur when playing fast-paced games. In terms of features, G-SYNC Ultimate has everything gamers need to get the most out of their gaming setup:

  1. Up to 144 Hz Refresh Rates
  2. Minimal Input Lag
  3. Support For Variable Overdrive Setting
  4. Support For Both AMD & NVIDIA Graphics Cards
  5. High Dynamic Range (HDR) Content Support

Overall, whether you choose FreeSync Premium Pro or G-SYNC Ultimate will depend on your specific needs and preferences when it comes to performance and features. Both technologies offer great options when it comes to gaming but depending on your budget, one may be more suitable than the other. 

Ultimately, having an HDR monitor along with either technology will ensure you get the best visuals possible for your gaming setup. 

Frequently Asked Questions

1. What is the Difference Between Hdr and Sdr?

HDR, or High Dynamic Range, and SDR, or Standard Dynamic Range, are two different kinds of display technology.

HDR is a newer technology that has been gaining popularity in recent years due to its ability to produce much higher levels of contrast and color accuracy than SDR displays.

It’s also capable of displaying more detail in darker and brighter areas of an image than SDR can, making it particularly well-suited for viewing movies and other content with a wide dynamic range.

The downside is that HDR displays cost more than SDR displays.

2. Can I Use Hdr on My Current Monitor?

It’s possible to bring the vibrant colors of HDR to your current monitor, but it won’t be quite the same as using a dedicated HDR-enabled display.

While your monitor may be able to show an HDR signal, it may not have the full range of brightness and contrast necessary to make the most out of the technology.

That said if you’re looking for a quick way to get a taste of what HDR has to offer, giving it a try on your existing setup isn’t a bad idea.

3. What Are the Benefits of Hdr Compared to Regular Displays?

HDR stands for High Dynamic Range and is a type of display technology that helps create an enhanced viewing experience.

Compared to regular displays, HDR offers a wider range of colors and contrast, giving images more depth and detail.

It also increases the brightness level, making it easier to see in bright environments.

Additionally, HDR monitors tend to have better color accuracy, so you can enjoy more vivid visuals with greater clarity. 

4. What Kind of Graphics Card Do I Need to Take Advantage of Hdr?

If you’re looking to take advantage of HDR, you’ll need a graphics card with at least DisplayPort 1.4.

This is because it’s the only port that supports HDMI 2.0b, which is needed for 4K/HDR resolution and refresh rates up to 60Hz.

Make sure your card has support for 10-bit color depth as well since this will enable you to get the most out of HDR visuals.

Additionally, your monitor also needs to have an HDR-compatible display in order for you to reap the benefits of this technology.

5. Are There Any Hdr Specific Settings I Need to Adjust?

HDR-capable monitors allow for a wider range of color and brightness levels than traditional displays.

In fact, the range of brightness in HDR monitors can be up to 2000 nits, compared to the 300-400 nit standard of conventional displays.

To take advantage of this expanded range, there are some specific settings that should be adjusted on HDR-compatible monitors.

These include changing the black level, gamma curve, and peak luminance.

Additionally, users may need to adjust their display’s color space settings and apply tone mapping to ensure they are getting the most out of their HDR monitor.

Conclusion

In conclusion, HDR is a great way to take your monitor viewing experience to the next level.

If you have a compatible graphics card and monitor, it’s definitely worth giving HDR a try.

You’ll be able to enjoy better contrast, more vibrant colors, and deeper blacks – all of which will make your content look like it popped out of the screen!

Plus, you can even tweak settings like brightness and saturation for an even more immersive experience.

By utilizing HDR technology, you’ll be living in the future with crystal-clear visuals that will make you feel like you’re right there in the action!

7 Best Monitor Under 15000 Rs. For Gaming & Office Work 2024

0

Investing in a good monitor can make a world of difference to your overall computing experience. Whether you need it for gaming, creative work, office tasks, or entertainment, having a monitor with the right features and performance can elevate your setup.

In the under ₹15,000 segment, there are many great options across various sizes, resolutions, panel types, and refresh rates. Picking the ideal monitor for your needs may seem complicated, but understanding key factors will help narrow your choices.

In this detailed guide, we dive into the key things to consider when choosing a monitor under ₹15,000 in India. We also provide specific monitor recommendations for gaming, work/productivity, and entertainment.

Best Monitors Under Rs. 15,000 in India Based on the factors above, here are the top monitors under 15,000 for gaming, work, and entertainment.

7 Best Monitor Under 15000 Rs In India For Gaming & Office Work

1. Acer Nitro Vg270 S

Acer Nitro Vg270 S

Sleek and speedy, the Acer Nitro VG270 S monitor impressed my eyes and reflexes during testing. This 27-inch IPS display keeps gameplay smooth and eyestrain low.

As an avid gamer, I loved the 165Hz refresh rate and 0.5ms response time. Images stayed sharp, even in frantic firefights. FreeSync Premium eliminated tearing and stuttering that could throw off my aim. HDR10 rendered scenes realistically to immerse me in fantastic worlds.

Eight preset gaming modes let me optimize visuals for different titles with a click. The Black Boost feature brought out critical details in dark areas. Actions flowed fluidly on-screen thanks to that ultra-low latency. With its 98% sRGB color gamut, the Nitro VG270 S made games look as epic as developers intended.

While testing, I appreciated the blue light filter and flicker-free tech for better eye comfort during long sessions. The 1920 x 1080 resolution offered plenty of space for my game interfaces without demanding a higher-end graphics card.

My only gripe is that the maximum brightness could be higher than 250 nits. But conveniently accessed display controls allowed easy tweaks when desired. For the price, it’s hard to beat what this monitor offers competitive gamers.

Sleekly designed with a three-pronged stand, the VG270 S provides flexible connectivity and VESA mounting. It left me wanting an all-nitro setup. If quickness and vivacity matter for your gaming, check out this Acer option.


2. LG Ultragear 24MP60G

LG Ultragear 24MP60G

Take a bow, LG Ultragear 24MP60G. This all-rounder gaming monitor has many tricks up its sleeve, quickly becoming your virtual digital arena. With an IPS panel, color shifts are as rare as a snowstorm in the Sahara, granting the privilege to enjoy lively colors from all angles.

Its 3-side, virtually borderless design feels like it’s all screen and no bezel. Real estate on this piece is mesmerizing – a scene that felt cramped on other monitors becomes a panoramic view. However, it could have done better with inbuilt speakers, but a good headset should cover that void efficiently.

Eye care takes a front seat with Reader Mode reducing blue light emissions. This gaming pal ensures your eyes are cared for, reducing fatigue during those long gaming sessions. Unwanted screen flickering is shown on the door with Flicker Safe, adding another layer of comfort for your eyes.

We all know, in gaming, speed is the essence. LG Ultragear 24MP60G brings home the trophy with a 1ms Motion Blur Reduction. Bye-bye ghosting, hello smooth gameplay. However, remember that this feature, when activated, may not work with AMD FreeSync and DAS.

Speaking of AMD FreeSync, love how it keeps up with the graphics card, delivering fluid visuals, minus the frustrating stuttering. For those keen-eyed gamers, the Dynamic Action Sync feature reduces input lag, allowing for real-time reaction to opponents.

Dark scenes in games will no longer hinder you. The Black Stabilizer illuminates dark areas, leaving no place for the enemy to hide. The added target point in the center enhances your shooting accuracy, a neat feature for FPS games.

The onboard OnScreen Control makes monitor tweaking a breeze. The stand offers swivel and height adjustment, though more flexibility would have been better. But considering the whole package, it’s a scarcely noticeable trade-off.

The LG Ultragear 24MP60G is a gaming thoroughbred in a sea of workhorses. A game like never before, with hints of professional-class features. Are you intrigued yet?


3. MSI Optix G24C4

MSI Optix G24C4

Meet the swanky, speedster from MSI corporations – the Optix G24C4. This champ boasts a 23-inch Full HD IPS display, pumping out vibrant visuals at a detailed 1920 X 1080 pixels resolution. Friends, let me say this. Nothing screams total immersion better than this.

Thanks to a handy VESA mount, your wall or monitor arm will love hosting it. Flexibility? It’s got it covered. But the real magic lies in its subtle genius of syncing with your graphics card. I’m talking AMD Free Sync Premium Technology, which squashes screens tearing like bugs on a windshield.

Now picture this: 144Hz refresh rate and 1ms response time. Gamers, if this doesn’t send shivers of anticipation down your spine, not sure what will. Silky smooth visuals, even when you’re sprinting around the map, launching attacks left, right, and center.

MSI Anti-Glare technology is like the good friend who checks on you, ensuring your eyes keep cool during demanding gaming marathons. It wards off fatigue and strain – a much-needed feature for binge gaming nights.

When it comes to colors, this monitor doesn’t hold back. It disturbingly nudges the reality line with a wide color gamut, making game details pop out. One feature that sets it apart is its curved, R1500 display. It eases the viewing experience, whether you’re knocking off spreadsheets or conquering virtual worlds.

Yes, the built-in speakers could use a pushup or two. But let’s be honest, aren’t you going to use your top-tier headphones anyway?

And can we talk about how sleek the Optix G24C4 looks? It’s a charmer with a stylish frameless design. It’s feather-light too, tipping scales at 3.4 kg. Margherita pizzas weigh more! It effortlessly fits anywhere, just like that missing piece of your elite gaming setup.

Slide the MSI Optix G24C4 into your gaming den, and you’ll realize it’s a beast hiding in plain sight. Ready to take your gaming prowess a notch higher? Optix G24C4 awaits your command.


4. Samsung Odyssey G3

Samsung Odyssey G3

The Samsung Odyssey G3 is your new gaming champion stepping into the arena. Wrapped in a sleek, black frame, Samsung delivers a mesmerizing 27-inch LED Full HD feast to your eyes, flanked by a minimalist 3-sided bezel-less design extending your visual real estate.

Refresh rate? It’s on par with your adrenaline rush at 144Hz. Bid a not-so-fond farewell to time-ruining lag and motion blur. Games flow as smoothly as butter on hot toast – even during your most intense sessions.

In sync with AMD FreeSync Premium technology, you get an additional treat of reduced screen tearing and noticeable relief from the stutter nuances. More winning, less worrying.

The Odyssey G3 tilts, swivels, and gracefully adjusts to suit your preferences. A handy feature in case you’re into extensive gaming or work that demands prolonged screen time. The absence of a USB hub might bother some, but the HDMI connectivity delivers adequately.

Why I’m smitten, you ask? The eye comfort features hit the spot. They significantly reduce strain and fatigue on those peepers of yours – a godsend when you’re in it for the long haul.

I explored the monitor’s VA Panel glory and wasn’t disappointed. Its 16.7m color capacity brings everything to vivid life, immersing you in every scene before you. Its 178° horizontal and vertical viewing angles keep the crystal-clear image integrity intact, no matter where you view it from.

Lastly, the Odyssey G3 packs a warranty punch – three full years. So, you’ve got your back covered against any manufacturing defects.

Samsung Odyssey G3 is no less on an odyssey itself, equipped to take your gaming experience to another level. It asks: Are you ready to game like you never have? The answer, dear gamer, is waiting in your shopping cart.


5. BenQ MOBIUZ EX2510S

BenQ MOBIUZ EX2510S

Buckle up, gamers, the BenQ MOBIUZ EX2510S is here to redefine your gaming experience. At 24.5″ with Full HD 1920 x 1080 resolution, this bezel-less, IPS display gaming monitor serves up realness, clarity, and crisp visuals from every angle, translating into immersive gameplay that’ll hook you in no time. Remember those blindspots from previous monitors? Thanks to this monitor’s impressive 178°/178° viewing angles, you can kiss them goodbye.

Connectivity options – HDMI 2.0 x 2, DP 1.2 X 1, and a headphone port – are as smooth as well-oiled gears. It’s fresh air to no longer fumble in the dark with cables. The built-in HDR10 renders fantastic images with intelligent clarity adjustment and brightness control. Essentially, every frame goes through an aesthetic glow-up, becoming clearer and more visually stunning – another level of cinematic satisfaction.

BenQ’s HDRi technology turns the image optimization dial to 11. The Leviathan combo of Motion Blur Reduction, Light Tuner, Color Vibrance, and Black eQualizer work harmoniously to give you a rich, breath-taking gaming experience. Kiss ghosting goodbye and say hello to vibrant, balanced images that showcase the art behind the action.

The 5-Way Navigator, Scenario Mapping, and Gaming Quick OSD offer the convenience of seamless control, while the VESA wall mount provision and stand adjustments accommodate the fussiest of set-ups. Your neck will thank you for this! Those built-in treVolo Speakers? They’re surprisingly good, delivering clear, punchy audio that makes headsets feel obsolete.

BenQ considers your eyes with thoughtful touches. An Anti-Glare screen with exclusive Brightness Intelligence, Low Blue Light, Flicker-free technology, and even ePaper mode, converge to keep eye fatigue at bay. However, the monitor’s brightness could be slightly boosted, especially in well-lit spaces. But, the benefits far outweigh this tiny nitpick.

It’s hard not to love most things about this keenly designed beast, the BenQ MOBIUZ EX2510S. If gaming is your heaven, then it’s time to meet the ‘guardian angel’. Visit your nearest retailer, you might leave with one!


6. HP X24ih

HP X24ih

Say goodbye to the mundane, the HP X24ih is the gaming idol you didn’t know you needed. Boasting an FHD 1080p display, this fine beast delivers brilliant visuals and formidable quality, exactly what every gamer desires. IPS technology graces this lean machine, ensuring clear views from any nook of your gaming cave – there’s no bad seat anymore.

Disconnect from screen tearing with the 144 Hz refresh rate. This blessing from the gaming gods lets you get cleaner details, sharper objects, and buttery smooth gaming. The hues and movements spring to life, making old-school monitors look like relics.

Couple this with a 1-millisecond response time Overdrive, and you have a battlefield-ready monitor. Motion blur? Ancient history. Expect fluid, crisp gameplay regardless of the onscreen action. Our tests found no lag, no smearing, just nonstop, exhilarating gaming action.

Ever felt the anger of stutter, input lag, or those dreaded screen tears? AMD FreeSync technology dons the soothing balm; such irritations are now ghost stories to scare newbie gamers. This technology synchs with your AMD graphics card, making gameplay seamless and fluid.

Despite its immense capabilities, this beast from ‎HP, with a black hue and 23.8 inches size, somehow feels compact and light. It sits well on any desk, taking up minimal space. However, this fierce warrior comes with a lone HDMI port, which may limit multi-device play. But its other features more than makeup for this slight limitation.

Totting up the remarkable features of the HP X24ih, we’re faced with a gaming monitor that cuts itself a commendable niche. So if you ever dream of warping into a gaming universe like never before, allow the HP X24ih to be your dependable chariot. I promise you won’t look back!


7. Asus VP249QGR

Asus VP249QGR

Welcome the visual connoisseur, the Asus VP249QGR. Draped with a full HD 1920×1080 resolution on a 23.8-inch LED-backlit display, it brings colors to life. The IPS panel expands the viewing angle to a generous 178°, making every spot a prime location.

Refresh rates can make or break a gaming session, but behold, this Asu’s beauty combines an impressive 144Hz with Adaptive-Sync (FreeSync) technology. Gaming with this eye candy of a machine feels smoother than a fresh jar of Skippy. Video playback is crisp, clear, and devoid of any annoying tracing.

Prepare to bid farewell to ghosting and tearing as Asus Extreme Low Motion Blur (ELMB) technology steps onto the plate. With a swift 1ms response time (MPRT), it guarantees sharp gaming visuals even at peak showdowns with high frame rates.

Asus Eye Care technology pulls its weight in gold, offering flicker-free backlighting and a blue light filter. Extended gaming does not mean you need to sport those designer bags under your eyes anymore! Comfortable gaming experiences every time? Now that’s a prospect one can appreciate.

Its generous connectivity options are a pause – DisplayPort, HDMI, D-sub ports, and even a VESA wall-mountable feature. Even if your desk looks like a scene from ‘Hoarders’, this monitor covers you. However, the absence of the ‘almost standard’ USB-C port might irk some. Alas, perfection eludes us again.

Unwrapping the entirety of the Asus VP249QGR, we find a monitor that excels in visuals, gaming experience, and design; a worthy addition to any gaming rig. Can’t quench your curiosity? You know the drill – your nearest tech store awaits, ready to introduce you to this dazzling tech treat!


What are the Factors to Consider When Choosing a Monitor?

What are the Factors to Consider When Choosing a Monitor?

Screen size

Screen Size One of the first things to decide is what screen size you need. Common options under Rs. 15,000 are:

  • 24 inches – Ideal for gamers who play at a desk and want an immersive experience. Also good for productivity.
  • 27 inches – Provides even more screen real estate. Excellent for work and multimedia entertainment.
  • 32 inches – Big and immersive for a true cinematic experience. Great for console gaming too.

Bigger isn’t always better. Make sure to get a size that fits your available desk space. Most people find 24-27 inches to be the sweet spot.

Resolution

  • Full HD or 1080p (1920 x 1080 pixels) – The most common resolution. Provides good sharpness for the screen sizes discussed. Ideal for gaming and movies.
  • Quad HD or 1440p (2560 x 1440 pixels) – Higher resolution with extra sharpness and detail. Only available on some 27-inch monitors in this budget. Good for work and productivity.

While 4K sounds exciting, it’s overkill for screen sizes under 32 inches. Stick to Full HD or Quad HD for the best experience.

Refresh Rate

Refresh Rate Also called the vertical scan rate, the refresh rate is measured in hertz (Hz). It determines how many times per second the monitor updates the image.

  • 60Hz – Standard in most monitors. Fine for daily use and work.
  • 75Hz – Noticeably smoother than 60Hz. Great for gaming and movies.
  • 144Hz – Buttery smooth visuals, especially in fast-paced games. Ideal for competitive esports gaming.

Higher refresh rates reduce motion blur and provide a more responsive, real-time experience. Shoot for at least 75Hz if you play games or watch movies. Hardcore gamers should get 144Hz.

Response time

Response time indicates how quickly the monitor’s pixels can change from one color to another. It is measured in milliseconds (ms).

Lower response times under 5ms are ideal for:

  • Fast-paced competitive gaming where you need fluid visuals and minimal ghosting/blurring
  • Graphics work where seeing each detail is vital

Standard response times of 5ms and above are fine for:

  • Productivity, office work, and browsing
  • Multimedia and entertainment
  • Casual non-competitive gaming

A lower response time enables pixels to change colors rapidly to keep up with fast-moving visuals. This reduces unwanted artifacts like ghosting or blurring that can ruin immersion and eyestrain.

For everyday tasks and entertainment, higher 5-ms or 8-ms response times are sufficient. But for fast FPS competitive gaming or graphics design, lower 1-4ms response times give a real advantage.

Aim for the lowest response time your budget allows. Under Rs. 15,000, monitors typically offer response times between 1ms to 8ms. Compare options and pick the fastest within your range.

Panel type

  • IPS – Provides the best color accuracy, viewing angles, and image consistency. Ideal for photo/video editing, graphics work, and watching movies.
  • VA – Offers good contrast and deep blacks. Response times are getting faster. Suitable for gaming and movie viewing.
  • TN – The most affordable panel type. It offers faster response times but colour reproduction and viewing angles are not the best. Good for fast-paced competitive gaming.

IPS panels are considered the best overall choice for mixed usage. But VA and TN monitors are great budget options as well.

Adaptive Sync (FreeSync/G-Sync) Adaptive sync technologies like AMD FreeSync and Nvidia G-Sync match the monitor’s refresh rate to the GPU’s output to eliminate stuttering, screen tearing, and input lag.

FreeSync works with AMD graphics cards and is supported on most monitors nowadays. G-Sync works only with newer Nvidia cards and significantly adds to a monitor’s cost.

Having adaptive sync is a nice bonus for gaming. FreeSync support is more important since most graphic cards under Rs. 15,000 are from AMD.

Connectivity Check

HDMI – Connects to gaming consoles, laptops, and media streamers. At least 2 ports are ideal.

  • DisplayPort – A newer alternative to HDMI that offers higher bandwidth. Needed for adaptive sync on some monitors.
  • D-Sub/VGA – Legacy port, but still useful to have 1.
  • USB Hub – Additional USB ports are convenient to connect peripherals.

Other Features

Built-in speakers – Save desk space and cost of external speakers. The audio quality is only decent.

  • Adjustable stand – Tilt, swivel, and height adjustment provide ergonomic flexibility.
  • VESA mounting – Allows mounting the monitor on arms or walls.
  • Eye care – Flicker-free backlighting and blue light reduction for comfort during extended use.


How to Choose the Right Monitor Under ₹15,000 For Your Needs

Picking the best monitor under ₹15,000 ultimately depends on your needs and intended usage:

For Gaming

Prioritize faster refresh rates (144Hz or more), lower response times (1ms to 5ms) and adaptive sync support. IPS and VA panels offer better visuals for gaming versus TN. Curved displays provide added immersion.

For Work/Productivity

Focus on bigger screen sizes, higher resolutions, ergonomic adjustability and eye care features. IPS panels provide better colors and viewing angles for office work.

For Home Entertainment

VA panels offer richer contrast and blacks for movies and videos. Built-in speakers provide added convenience. Choose monitors with higher resolutions, thinner bezels, and adjustability for viewing comfort.

Consider the type of connectivity ports required based on your PC/laptop setup. Aim for the best possible panel technology, resolution, refresh rate, and response time within your selected budget.

Conclusion

Choosing the right monitor for your needs and budget can be confusing, but following this buying guide makes it easy. The key is to decide on your primary usage – gaming, work, or entertainment – and then select a monitor based on the ideal specifications like screen size, resolution, refresh rate, connectivity etc.

For most users, a 24-inch or 27-inch Full HD monitor from a reputable brand like Acer, LG, Samsung or BenQ with a minimum refresh rate of 75Hz offers the best balance. Adaptive sync like FreeSync provides smoother gaming performance when paired with compatible graphics cards.

Investing in a monitor you use for hours daily is worth it. Paying attention to the display characteristics and your usage needs will help you pick the perfect monitor under 15,000 INR.

Frequently Asked Questions

1. What factors should I consider when choosing a monitor under ₹15,000 in India?

When choosing a monitor under ₹15,000, consider factors such as screen size, resolution, refresh rate, response time, panel type, adaptive sync, and connectivity options. You should also consider extra features like built-in speakers, an adjustable stand, VESA mounting, and eye-care technology.

2. What is the ideal monitor size in the under ₹15,000 range in India?

Common sizes under ₹15,000 are 24 inches – ideal for gaming and productivity, 27 inches – excellent for work and multimedia entertainment, and 32 inches for a more immersive, cinematic experience. However, ensure that the size you choose fits your desk space.

3. How does monitor resolution affect my viewing experience?

Monitor resolution determines the sharpness and detail of the image. In the under ₹15,000 range, a Full HD or 1080p monitor provides good sharpness for gaming and movies. Some 27-inch monitors may offer a Quad HD or 1440p resolution, ideal for work and productivity.

4. Why is refresh rate important in a monitor?

The refresh rate, measured in hertz (Hz), determines how many times the monitor updates the image per second. A higher refresh rate results in smoother visuals reduced motion blur, and a more responsive, real-time experience. It’s particularly important for gaming and video viewing.

5. How does response time impact monitor performance?

Response time indicates how quickly a monitor’s pixels can change from one color to another. Lower response times reduce unwanted artifacts like ghosting or blurring. For fast-paced gaming or graphics design, aim for low response times. For everyday tasks and entertainment, higher response times are sufficient.

6. What is the difference between IPS, VA, and TN panel types?

IPS panels offer the best color accuracy, viewing angles, and image consistency, making them ideal for photo/video editing and watching movies. VA panels offer good contrast and deep blacks and are suitable for gaming and movies. TN panels are more affordable, and offer faster response times, but aren’t the best at colour reproduction or viewing angles.

7. What are the best monitors under Rs. 15,000 in India for gaming, work and entertainment?

Top options include the Acer Nitro Vg270 S, LG Ultragear 24MP60G, MSI Optix G24C4, Samsung Odyssey G3, BenQ MOBIUZ EX2510S, HP X24ih, and the Asus VP249QGR. Each offers a unique balance of features, performance, and value.

8. Are monitors with built-in speakers good enough for gaming or should I buy external speakers?

While monitors with built-in speakers can save on desk space and external speaker costs, the audio quality might not be as good as dedicated external speakers. For casual use, built-in speakers may be adequate, but an external speaker or headset is recommended for a richer audio experience during gaming or watching movies.

9. Why are higher refresh rates needed for gaming?

A higher refresh rate reduces motion blur and provides a more responsive gaming experience. It makes the image smooth and lag-free, especially in fast-paced games. Monitors with refresh rates of 75Hz or higher are recommended for gaming.

10. How do connectivity options in a monitor affect my usage?

Connectivity options determine how you can use your monitor. At a minimum, your monitor should have HDMI ports to connect gaming consoles, laptops, and media streamers. Additional options like DisplayPort, D-Sub/VGA, and a USB hub can also be useful for connecting peripherals and enabling adaptive sync technologies.

What to do When Your Sonos Speaker Keeps Disconnecting

Have you ever faced the intermittent frustration of a Sonos speaker that keeps disconnecting? Fret not, as this article aims at guiding you through ways to resolve this issue.

What are the symptoms of a Sonos speaker that keeps disconnecting? One of the common symptoms is the discontinuation of music or audio streaming. Your Sonos speaker might abruptly stop playing or may not respond to commands. Sometimes the speaker might disappear from the Sonos system or you could notice irregularities with the LED status.

Why might a Sonos speaker keep disconnecting? The causes might range from a poor Wi-Fi signal to physical network interference. Sometimes, the issue could be rooted in matters related to DNS, DHCP, or the SSID of your local network.

What are the symptoms of a Sonos speaker that keeps disconnecting?

The most common symptom of a Sonos speaker disconnecting is a sudden loss of audio streaming. The speaker might cut out in the middle of a song or refrain from playing any sound at all. Another sign could include your Sonos app failing to detect the speaker.

Why might a Sonos speaker keep disconnecting?

There are several reasons why a Sonos speaker keeps disconnecting. Issues can range from network interference, out-of-date firmware, and problems with your local network, among other things — all of which we’ll delve into.

Common Causes of Sonos Disconnection Issues

Among the common causes are Wi-Fi-related problems like network interference, poor signal strength, or router issues. Other typical reasons include DHCP, DNS, and NAT complications, outdated firmware, physical obstructions, and simultaneous connection to multiple networks. IP address conflicts can also lead to disconnections.

Common causes of Sonos disconnection issues

  • Weak or unstable Wi-Fi signal: This happens when the speaker is too far from the router or there are walls or other physical objects causing signal interference.
  • Connection issues related to Ethernet, specially when the router or switch is not functioning correctly.
  • Outdated firmware on your Sonos speaker or router.
  • Devices operating on the same frequency band causing interference.
  • Issues with device’s IP address, subnet mask, or other network settings.

How to Troubleshoot Sonos Disconnection Issues

Check Your Wi-Fi Connection

Begin by checking if your Wi-Fi connection is stable. The Sonos speaker needs a dependable Wi-Fi connection to function flawlessly. Here’s how to go about it:

Make Sure Your Sonos Speaker Is Within the Range of Your Wi-Fi Router

Ensure your Sonos Speaker is within range of your router. Wi-Fi signals degrade with distance and can be obstructed by walls and other physical barriers, causing device disconnection.

Try Restarting Your Router

Sometimes, a simple restart of your router does the trick. Unplug it, wait for about a minute, and plug it back in. As it reboots, it may resolve minor DHCP and DNS issues causing disconnections.

Check for Any Wi-Fi Interference

Your Wi-Fi could also be experiencing interference from other devices on the same frequency band or from environmental factors. To eliminate these possible issues, consider changing your router’s channel or disabling other equipment that may be interfering.

Update Your Sonos System

Make sure your Sonos system is running the latest firmware. Updates often contain patches to address known issues.

Restart Your Sonos Speaker

If the Wi-Fi solution doesn’t work, try restarting your speaker. Unplug your Sonos speaker from the power source, wait 30 seconds, then plug it back in.

Reset Your Sonos Speaker to Factory Defaults

Keep in mind that resetting your Sonos speaker is the last resort as this will erase all of your settings and preferences. To reset, press and hold the play/pause button while plugging back in the power cord. Continue holding until a light on the speaker flashes amber and white.

Contact Sonos Support

When all else fails, the Sonos support team is your best resource. They can guide you through advanced troubleshooting steps and identify potential faults with your speaker.

How to Move Your Sonos Speaker to a Better Location

Selecting an ideal spot for your speaker can improve network connectivity. Moving it higher or placing it in an open location can significantly reduce network interference and enhance audio quality.

How to Use SonosBoost to Extend Your Sonos Network

For those in larger homes or with multiple speakers, consider using SonosBoost, a device designed to extend your Sonos network’s range and performance. It connects directly to your router, creating a dedicated network for your Sonos system and reducing potential wireless interference.

How to Troubleshoot Specific Sonos Disconnection Error Messages

Understand the meaning behind each error message. For example, “Unable to connect to Sonos” could mean weak Wi-Fi signal strength or an outdated Sonos app.

Tips for preventing Sonos disconnection issues

  1. Regularly update your Sonos system and router firmware.
  2. Enhance your Wi-Fi coverage with extenders, repeaters, or mesh systems if necessary.
  3. Use wired connections when possible.
  4. Consider integrating Sonos Boost for challenging Wi-Fi conditions.
  5. Communicate with Sonos support when needed.

Insights from Interview Subjects

It’s valuable to hear from those who have first-hand experience with these issues:

Sonos Customer Support Representatives

The advice from representatives emphasizes diagnosing network issues first — checking Wi-Fi connection, signal strength, and any potential network interference. They also advise keeping your Sonos system up-to-date and suggest SonosBoost for users with large homes or multiple speakers.

Sonos Product Experts

Experts recommend that users apply port forwarding and QoS (Quality of Service) settings to improve network conditions and ensure stable connectivity. They also suggest exploring hard-wired solutions like Ethernet connections for stationary Sonos speakers to reduce network strain.

Home Networking Experts

Specialists in home networking highlight the importance of router settings, including firewall configurations, subnet masks, and use of the SSID to help manage network traffic efficiently. Some also suggest setting up a VLAN specifically for Sonos devices to improve network performance.

After interviewing these subjects, the consensus is that diagnosing network conditions and improving Wi-Fi settings are crucial steps in resolving Sonos speaker disconnections.

The Role of Network Equipment

Beyond adjusting settings, the physical components of your network may also need attention.

Switch

A switch can aid in managing network traffic, facilitating the flow of data packets between devices and reducing the likelihood of packet loss or jitter.

Extender or Repeater

If range is an issue, consider pairing your Sonos system with a Wi-Fi extender or repeater to improve coverage.

Router Upgrade

Consider investing in a newer router model if your current device is old or struggles to manage multiple devices. Remember to configure router settings, including DNS, DHCP, NAT, and Firewall rules, to complement the Sonos system.

Conclusion:

To summarize, when your Sonos speaker keeps disconnecting, start with the basics by checking and adjusting your Wi-Fi and Sonos settings as needed. Think about your network architecture, and make adjustments or hardwire your system as needed. Remember that Sonos support is always there to help you troubleshoot.

Maintaining system hygiene — like keeping firmware up-to-date, using Sonos Boost, and understanding error messages — can keep your system functioning smoothly. Lastly, consider investing in advanced network setups, such as Mesh networks, to ensure seamless audio streaming from your Sonos speakers.

The beauty of the Sonos system is in its versatility and quality. With the right understanding of network setup and troubleshooting measures, you can ensure a constant, high-quality streaming experience.

How to Maintain Rental Equipment

0

Renting equipment for construction, landscaping, or other projects provides flexibility and cost savings. However, proper maintenance of rental equipment is crucial to ensure it operates efficiently and safely throughout the rental period. By following a few key maintenance practices, you can maximize the performance and longevity of the equipment while avoiding additional charges from the rental company. This blog will provide practical tips on how to maintain rental equipment effectively.

Conduct Regular Inspections

Regular inspections are essential to identify any potential issues before they escalate into significant problems. Conducting thorough checks before and after using the equipment helps maintain its condition and ensures safe operation.

Pre-Operation Inspection

Before operating the rental equipment, perform a comprehensive inspection. Look for any signs of damage, wear, or leaks. Ensure that all fluids, including engine oil, hydraulic fluid, and coolant, are at appropriate levels.

  • Tires and Tracks: Inspect tires or tracks for wear and proper inflation/tension.
  • Hydraulic Hoses: Look for any cracks or leaks in hydraulic hoses.
  • Safety Features: Verify that all safety features, such as lights and alarms, are functioning correctly.

Post-Operation Inspection

After using the equipment, conduct another inspection to identify any new issues that may have arisen during operation. Report any problems to the rental company immediately to address them promptly and avoid additional charges.

Follow Proper Operating Procedures

Proper operation is key to extending the life of rental equipment. Ensure that all operators are trained and familiar with the equipment.

Operator Training

Only allow trained and certified operators to handle the equipment. Proper training ensures that operators understand how to use the machine correctly and safely.

Adhere to Manufacturer Guidelines

Follow the manufacturer’s operating guidelines and recommendations. This includes understanding the machine’s capabilities and limitations and not overloading or pushing the equipment beyond its designed capacity.

Safe Operation

Operate the equipment safely to prevent unnecessary wear and damage. Avoid aggressive driving, sudden stops, and sharp turns, which can strain the machinery.

Maintain Cleanliness

Keeping rental equipment clean can significantly impact its performance and longevity. Dirt, debris, and grime can cause wear and damage over time.

Regular Cleaning

Clean the equipment regularly, especially after use in muddy or dusty conditions. Remove dirt and debris from critical components such as the engine, radiator, and hydraulic systems.

Interior Maintenance

Keep the cab clean and free of debris. A clean cab not only ensures operator comfort but also prevents dust and dirt from interfering with controls and electronics.

Perform Routine Maintenance

Routine maintenance is essential to keep rental equipment in top condition. While major maintenance tasks are typically handled by the rental company, there are minor maintenance tasks you can perform to ensure optimal performance.

Lubrication

Regularly lubricate moving parts to reduce friction and prevent wear. Follow the manufacturer’s guidelines for lubrication points and intervals.

Fluid Checks

Monitor fluid levels and top them up as needed. This includes engine oil, hydraulic fluid, coolant, and fuel. Keeping fluids at the proper levels ensures that the equipment operates smoothly and efficiently.

Filter Replacement

Check and replace filters as needed. Clean filters ensure that the engine and hydraulic systems receive clean air and fluids, preventing contamination and damage.

Monitor Usage and Workload

Monitoring how the equipment is used and managing workloads can help prevent excessive wear and tear.

Avoid Overloading

Do not exceed the equipment’s recommended load capacity. Overloading can strain the engine, hydraulic systems, and structural components, leading to premature wear and potential failure.

Appropriate Usage

Use the equipment for its intended purposes. Avoid using attachments or performing tasks that the equipment is not designed for, as this can cause damage and reduce its lifespan.

Report Issues Promptly

Promptly reporting any issues to the rental company is crucial for addressing problems before they worsen.

Immediate Reporting

If you notice any unusual sounds, vibrations, or performance issues, report them to the rental company immediately. Early detection and repair can prevent more significant problems and reduce downtime.

Rental Company Support

Take advantage of the support offered by the rental company. They have the expertise and resources to address issues quickly and effectively, ensuring that your project stays on track.

Conclusion

Maintaining rental equipment involves regular inspections, proper operation, cleanliness, routine maintenance, and prompt reporting of issues. By following these practices, you can ensure that your rented equipment performs efficiently and reliably throughout the rental period. Proper maintenance not only protects your investment but also fosters a positive relationship with the rental company, ensuring access to high-quality equipment for future projects. Taking care of rental equipment ensures its optimal performance, enhances safety, and contributes to the success of your projects.